DIY Mason Jar Hummingbird Feeder: 7 Steps!
Creating a DIY Mason Jar Hummingbird Feeder involves preparing a sugar-water mixture as the feed, pouring it into the mason jar, attaching the hummingbird feeder tube to the jar’s mouth, and finally, hanging it in your garden.
All you need is a mason jar, a hummingbird feeder tube, some sugar, and water.
Hummingbirds are attracted to these feeders and the sugar-water mimics the nectar they feed on in the wild.
Benefits of a Mason Jar Hummingbird Feeder:
This DIY project is fun and easy and is a great way to make an affordable and long-lasting birdfeeder.
The Mason Jar is durable and capable of withstanding any bad weather, plus it’s also easy to take down and move around at a moment’s notice.
Plus, the sugar water is simple to make with only water and sugar and can last up to a week before needing to be refilled.
With a little effort and creativity, your hummingbirds will surely love their new DIY Mason Jar Hummingbird Feeder.
7 Steps to DIY Mason Jar Hummingbird Feeder
| Step # | Instructions | Needed Materials |
| 1 | Gather all materials. | Mason jar, red plastic plate, string, sugar, water, hot glue gun |
| 2 | Cut a small hole in the center of the plastic plate big enough for a hummingbird’s beak. | Red plastic plate, scissors |
| 3 | Attach the Mason jar upside down to the plastic plate using the hot glue gun. Make sure the hole aligns with the mouth of the jar. | Mason jar, hot glue gun, red plastic plate |
| 4 | Mix 1 part sugar with 4 parts water to create hummingbird nectar. | Sugar, water |
| 5 | Fill the Mason jar with the sugar water mixture. | Mason jar, sugar water mixture |
| 6 | Tie the string around the edge of the Mason jar lid and hang the feeder outside, preferably near a window so you can watch the hummingbirds. | Mason jar, string |
| 7 | Refill the jar with sugar water as needed. | Sugar, water, mason jar |
Key Takeaway
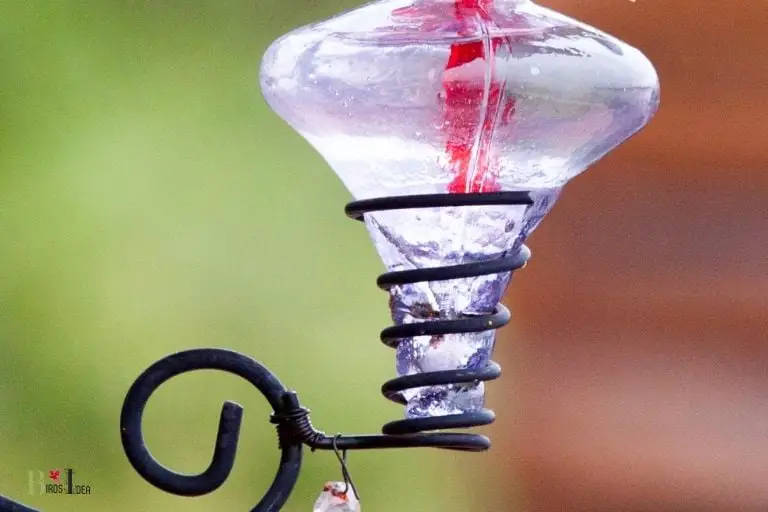
Five Facts About: Hummingbird Feeder
DID YOU KNOW
Reports show that 80% of wild birds will use both store-bought and DIY birdfeeders.
Step By Step: DIY Mason Jar Hummingbird Feeder:
1. Gather materials: You will need a Mason jar, a hummingbird feeder base, a drill, a 1/4 inch drill bit, a scissors, and a ribbon.
2. Drill a hole: Use the drill and 1/4 inch bit to drill a hole in the center of the Mason jar lid. Make sure the hole is big enough for the hummingbird feeder base to fit through snugly.
3. Attach the hummingbird feeder base: Push the hummingbird feeder base through the hole in the lid, making sure it is secure and won’t fall out.
4. Fill the jar with nectar: Mix 1 part white granulated sugar with 4 parts water, and pour the mixture into the jar. You can also use pre-made nectar.
5. Replace the lid: Screw the lid with the hummingbird feeder base attached back onto the jar.
6. Add ribbon: Tie a ribbon around the top of the jar to add a decorative touch and make it easy to hang.
7. Hang the feeder: Find a spot in your yard that is visible to hummingbirds, but also out of direct sunlight and near a source of perching. Hang your feeder from a tree branch, a shepherd’s hook, or a hanger.
Enjoy: Wait for the hummingbirds to find your feeder and watch them from a safe distance. Don’t forget to clean and refill the feeder every few days to keep the nectar fresh.
What is a Mason Jar Hummingbird Feeder?

A Mason Jar Hummingbird Feeder is a type of feeder designed to attract hummingbirds to your backyard or garden.
It is made from a wide-mouthed Mason jar and is used to fill with a hummingbird-friendly type of food, usually a sugar water solution.
The top of the jar is often covered with mesh so that the hummingbirds can drink the nectar without getting their wings or bills wet. The hummingbird feeder is usually hung from a tree branch or a pole.
Mason jar feeders are a great way to attract hummingbirds to your backyard. They are easy to maintain, as they only need to be refilled every couple of weeks.
Additionally, the wide-mouthed jar makes it easy to clean every few weeks and replaces the nectar solution.
The mesh top also provides a barrier between birds and the nectar, preventing them from becoming too comfortable and drinking too much nectar at once.
Some advantages of using a Mason jar feeder include:
- Easy to maintain
- Easy to clean and replace the nectar
- Protects birds from drinking too much nectar
- Attracts hummingbirds to the backyard or garden
What Materials are Needed to Make a Mason Jar Hummingbird Feeder?
Making a mason jar hummingbird feeder is a simple, inexpensive way to bring beautiful hummingbirds to your area.
To make a mason jar hummingbird feeder, you will need the following items:

- A 32oz mason jar
- A lid for the jar (metal lids work best)
- A piece of wire
- A small saw
- A drill
- A small dowel or stick
- A hummingbird feeder base
- Hummingbird nectar
To begin, use the saw to cut a hole in the center of the lid large enough to fit the dowel or stick. Once the hole is cut, use the drill to make four small holes arranged in a square in the lid.
Thread the wire through the holes and tie a knot to secure it. This will act as the perch for the hummingbird.
Next, attach the dowel or stick to the lid. You can do this by cutting a small slit in the dowel and threading it through the wire. Then attach the lid to the mason jar.
Finally, attach the hummingbird feeder base to the dowel or stick.
Fill the mason jar with hummingbird nectar and hang it up near a window or other area where hummingbirds frequent. Now you have a beautiful mason jar hummingbird feeder to enjoy!
How to Assemble the Mason Jar Hummingbird Feeder?
Assembling a Mason Jar Hummingbird Feeder is an easy and rewarding task that anyone can do at home!
Follow the steps below to assemble your hummingbird feeder in just a few simple steps:

- Start by gathering all the necessary supplies. You will need a mason jar, a lid, a feeder tube, some tubing, a plastic hook and some rope.
- Place the lid on the jar and make sure it is securely in place.
- Place the feeder tube in the middle of the lid and secure it with the tubing.
- Place the plastic hook on the side of the lid and secure it with the rope.
- Fill the jar with hummingbird food and place it in the desired location.
- Hang the feeder from the plastic hook and enjoy watching the hummingbirds feed!
With these steps, you can easily assemble your Mason Jar Hummingbird Feeder. Once assembled, you can hang the feeder in your backyard and watch the hummingbirds come to feed! Enjoy!
“The best way to practice conservation is to put it into action.”
birdsidea
How to Make Sugar Water for Your Feeder?
Making sugar water for a feeder is a simple and easy way to provide food for hummingbirds and other birds. With just a few ingredients, you can make a sugar water solution that will attract and nourish birds.
To begin, you’ll need to gather the following supplies:
- Sugar
- Water
- Feeder

The exact quantity of sugar and water will depend on the type and size of feeder you’re using. Generally speaking, a ratio of one part sugar to four parts water is recommended.
For example, you could use 1 cup of sugar to 4 cups of water. Once your ingredients are ready, dissolve the sugar into the water. Stir the mixture until all the sugar is dissolved.
Then, pour the solution into the feeder. Make sure the feeder is securely attached in a safe place, away from predators and out of direct sunlight.
Refill the feeder with more solution as needed. If you live in a warm climate, you may need to refill it more frequently, as the solution can quickly spoil. It’s important to keep the feeder clean.
Be sure to empty and rinse it at least once a week and replace the solution with fresh sugar water.
By making your own sugar water, you can provide an easy and economical food source for birds in your area.
Tips for Placing Your Mason Jar Feeder
Placing your Mason jar feeder is an important part of attracting birds to your yard.
Here are some tips to help you create the perfect spot for your feeder:

- Place the feeder in a spot that provides protection from predators, such as a spot close to a tree or shrub.
- Place the feeder near a window, so you can easily observe the birds.
- Make sure the feeder is in a spot that gets plenty of sunlight so the food won’t become damp.
- Position the feeder at least five feet away from any structures, this will help to ensure the safety of the birds.
- Choose an elevated location to place the feeder, as this will make it easier for birds to access the food.
By following these tips, you can create the perfect spot for your Mason jar feeder. This will make it easier for birds to access the food and help to keep them safe from predators.
Additionally, you will be able to enjoy the beauty of the birds from a comfortable distance.
Benefits of a Mason Jar Hummingbird Feeder
Mason jar hummingbird feeders have several benefits that make them a great choice for birders.
- Firstly, they are a highly affordable option, often costing less than traditional feeders.
- Secondly, they are a very attractive option and can easily be incorporated into a backyard decor.
- Thirdly, they are easy to clean and last for many years, so you won’t need to replace them often.
- Finally, they offer an excellent source of food for hummingbirds, and the jar shape is easily accessible for the birds to get to the food.

Below are some additional benefits of using a mason jar hummingbird feeder:
- Cost effective
- Easy to clean
- Attractive design
- Long-lasting
- Easily accessible to hummingbirds
- Ability to handle varying amounts of food
- Unique design options
- Easy to hang up
- Simple to refill
- Variety of colors and designs available.
For example, a mason jar hummingbird feeder allows you to conveniently hang it up as it comes with a hook at its top. This makes it easy to hang in the backyard and watch hummingbird’s feed.
Also, mason jar hummingbird feeders are available in a variety of colors and designs, so you can easily find one that fits the aesthetic of your outdoor area.
Maintenance of the Mason Jar Hummingbird Feeder
Maintaining a Mason Jar Hummingbird Feeder is a critical part of ensuring a successful bird-watching experience.
Here are some tips for keeping the feeder in optimal condition:

- Clean the feeder regularly with a mild solution of soap and water. This will help prevent the build-up of bacteria, mold, and other contaminants.
- Make sure to fill the feeder with fresh nectar every two to three days, especially during the warmer months. This will ensure the birds have access to food and that the nectar does not spoil.
- Check for leaks each time you fill the feeder. If there is a leak, replace the feeder with a new one.
- Hang the feeder at least six feet high to prevent cats or other predators from reaching it.
- Place the feeder in a sunny spot to attract the birds.
- Place the feeder away from bird feeders that are meant for other types of birds.
By following these simple maintenance tips, you can ensure that the hummingbird feeder is kept in excellent condition for the birds to enjoy.
FAQ of DIY Mason Jar Hummingbird Feeder
What materials are needed to make a DIY mason jar hummingbird feeder?
How do I make the hole for the hummingbird feeder?
Can I use any type of jar to make the hummingbird feeder?
How often should I change the hummingbird nectar?
How should I clean the diy mason jar hummingbird feeder?
Conclusion
Building a DIY Mason Jar Hummingbird Feeder is a great way to make a reliable, long-lasting, and affordable feeder from the comfort of your home.
It’s easy to make, easy to clean and maintain, and perfect for bird lovers who are traveling. With the right supplies, some creativity, and effort, a fun and rewarding project await.


