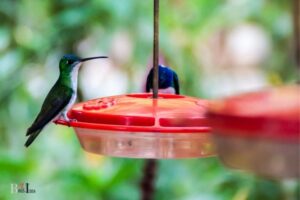
DIY Test Tube Hummingbird Feeders: Creative Way!
DIY test tube hummingbird feeders are an affordable and creative way to attract hummingbirds to your yard, providing them with the nectar they need while adding a touch of charm to your outdoor space
DIY test tube hummingbird feeders are a great alternative to store-bought feeders, which can be expensive and may not fit your aesthetic preferences.
By using test tubes and crafting your own feeder, you can personalize the design and create something that matches your desired style.
Additionally, homemade feeders can be more cost-effective and environmentally friendly, as they often repurpose and recycle materials.
DIY test tube hummingbird feeders are not only an affordable option but also allow you to channel your creativity and create a unique and personalized feeder.
You can use materials such as copper wire, twine, or even a small branch to hold the test tubes in place and create a design that suits your taste. Additionally, making your own hummingbird nectar is a simple process, requiring only sugar and water. This
8 Steps to DIY Test Tube Hummingbird Feeders:
| Step # | Instructions | Materials Needed |
| 1 | Gather materials | Test tubes, caps or corks, wire, beads |
| 2 | Create wire holder for test tube | Wire |
| 3 | Decorate wire with beads | Beads, wire |
| 4 | Fill test tube with hummingbird nectar | Hummingbird nectar, funnel |
| 5 | Insert cap or cork with small hole for hummingbird beak | Cap or cork with small hole |
| 6 | Attach wire holder to test tube | Test tube with nectar, wire holder |
| 7 | Hang test tube hummingbird feeder in a suitable location | Completed test tube feeder |
| 8 | Regularly clean and refill feeder | Soap, water, fresh hummingbird nectar |
Key Takeaway

Five Facts About: DIY Test Tube Hummingbird Feeders
Understanding Hummingbirds And Their Feeding Habits
Introducing Hummingbirds And Why They’Re Important
Hummingbirds are tiny, beautiful creatures that bring joy to all garden lovers. There are over 300 different types of hummingbird species in the world, and they come in a variety of colors and sizes.
These creatures are important not only for their beauty but also for their essential role in pollinating flowers.
Without them, many plants would not survive. It’s essential to ensure that hummingbirds have a suitable environment for feeding and nesting.
The Ideal Diet And Feeding Frequency For Hummingbirds
Hummingbirds have a unique diet consisting mainly of nectar from flowers and insects, which provides essential nutrients. They require high-energy food as they burn calories at a high rate.
The ideal diet for hummingbirds should be rich in sucrose, which is found in most nectar sources.
They need to feed frequently, and a good rule of thumb is to fill the feeder every 2-3 days, especially during the migration season.
To keep hummingbirds healthy and active, consider adding a tablespoon of sugar to every cup of water in your feeder, and avoid adding red dye or honey.
Also, ensure that you keep the feeder clean by washing it with hot water and soap every time you refill it.
This will prevent mold from growing, which can be harmful to hummingbirds, and change the solution if it looks cloudy.
Tips For Ensuring A Safe And Healthy Food Environment For Hummingbirds
To attract hummingbirds to your garden, you’ll need to create a safe and healthy environment for them to feed and nest in.
When selecting a hummingbird feeder, consider one with adequate coverage and capacity to avoid overcrowding, which can lead to territorial fights.
Also, choose a feeder that is easy to clean and made of durable materials.
Place the feeder in a shaded area to prevent it from getting too hot, and keep it away from windows or reflective surfaces, which can cause injuries.
Additionally, provide a source of freshwater nearby for drinking and bathing, and plant some flowering trees and plants to attract more hummingbirds.
By following these tips, you’ll create a welcoming and safe environment for these special creatures!
Materials Needed For A Diy Test Tube Hummingbird Feeder
Diy Test Tube Hummingbird Feeders: Materials Needed
If you’re a bird lover, especially of hummingbirds, you’re going to love this diy project. In this post, we’ll guide you through the materials needed for a diy test tube hummingbird feeder.
Choosing The Right Test Tubes
Test tubes come in many different shapes and sizes. It’s important that you choose the right size for your hummingbird feeder, so that it can hold enough nectar to keep your little feathered friends happy and well-fed.
Here’s what you need to keep in mind when selecting your test tubes:
- Choose test tubes that are between 6 and 8 inches long. This is the ideal size for a hummingbird feeder.
- Make sure the test tubes you choose have a diameter of at least 1.5 inches. This will allow the hummingbirds to insert their beaks to sip the nectar.
- Opt for clear glass test tubes to allow for easy monitoring of the nectar levels.
Selecting The Best Type Of Durable Wire Or String
Another aspect to consider when making a hummingbird feeder is how to attach it securely. For that, you need a durable wire or string that will ensure your feeder stays in its spot, even during windy days.
Here are the key points to keep in mind:
- Use thin-gauge wire or string for this project.
- Copper wire is a good choice, as it doesn’t rust and weathers well. You could also use floral wire or fishing line.
- Make sure the wire or string you choose is strong enough to hold the weight of the test tube, nectar, and the hummingbird’s weight.
Mixing The Ideal Nectar Solution Using Household Ingredients
Hummingbirds thrive on nectar, which is a combination of water and sugar.
Here are the ingredients and proportion you need to create the perfect nectar recipe for your hummingbird feeder:
- Use four parts water to one part granulated white sugar.
- Bring the mixture to a boil in a pot on the stove, then simmer for 5 minutes.
- Let the nectar cool down before pouring it into the test tubes.
- You can also add food coloring to the mixture if desired, but it’s not necessary.
That’s it! With these materials and instructions, you’re all set to create your very own diy test tube hummingbird feeder. So go ahead and give it a try – your hummingbird friends will thank you!
Step-By-Step Guide To Building A Test Tube Hummingbird Feeder
Hummingbirds are fascinating creatures to watch, and installing a hummingbird feeder is a great way to attract them to your yard.
While there are many different styles of hummingbird feeders available, a test tube feeder is an easy and inexpensive option to make at home.
In this post, we’ll guide you through the process of building a test tube hummingbird feeder step-by-step.
Constructing The Frame Or Cage To Hold The Test Tubes
The first step in making a test tube hummingbird feeder is constructing a frame or cage to support the test tubes.
Here’s what you’ll need:
- Metal wire mesh
- Pliers
- Wire cutters
- Ruler
- Marker
Follow these steps to make the frame or cage:
- Use the wire cutters to cut six pieces of wire mesh, each measuring 6 inches by 6 inches.
- Use the pliers to shape each square of wire mesh into a cylinder shape, with a diameter of around 3 inches.
- Use the wire cutters to trim the excess wire from the cylinders.
- Join the cylinders together by twisting the wires at the ends of each cylinder, forming a hexagonal mesh cage.
- Use the ruler and marker to mark out a vertical section on the cage, making sure it’s wide enough to fit the test tubes.
Securing The Test Tubes To The Frame Or Cage
Once the frame or cage is ready, you’ll need to secure the test tubes to it.
Here’s what you’ll need:
- Test tubes
- Wire
- Pliers
- Wire cutters
Follow these steps to secure the test tubes:
- Cut six pieces of wire, each measuring around 6 inches long.
- Bend each piece of wire into a u-shape, leaving a small loop at the top.
- Loop each wire through the top of a test tube, making sure the u-shape wire is centered.
- Attach the wires to the hexagonal mesh cage using the loops at the top of the u-shape wire.
- Adjust the positioning of each test tube to ensure they’re evenly spaced and secure.
Adjusting The Positioning Of The Feeder To Attract Hummingbirds
Now that your test tube hummingbird feeder is complete, it’s important to position it correctly to attract hummingbirds.
Here are some tips:
- Hang the feeder in a shaded area to keep the nectar fresh for longer.
- Place the feeder near flowering plants and shrubs to attract hummingbirds.
- Keep the feeder away from windows to prevent bird strikes.
- Regularly clean the feeder to avoid bacteria growth.
By following these simple steps, you’ll have a beautiful and functional hummingbird feeder in no time!
Proper Maintenance And Cleaning Techniques
Importance Of Regular And Consistent Maintenance
To keep your diy test tube hummingbird feeders in good condition, regular and consistent maintenance is necessary.
The following are some key points to keep in mind:
- Clean the feeder at least once every two days to prevent the growth of mold and bacteria which can be harmful to hummingbirds.
- Check the feeder for any cracks or damages that may cause leaks and spills.
- Refill the feeder only when the nectar has been consumed completely.
- Keep the feeder away from direct sunlight and windy areas to avoid fermentation and spoilage.
Safe And Effective Cleaning Solutions
Cleaning your diy test tube hummingbird feeders is crucial to ensure the health and well-being of hummingbirds.
Here are some safe and effective cleaning solutions to keep your feeder clean:
- Use a solution of one-part vinegar to four parts water to soak the feeder for at least thirty minutes.
- Rinse the feeder with hot water and scrub any remaining residues with a small bottle brush.
- Let the feeder dry completely before filling it with fresh nectar.
How To Monitor And Handle Pests And Other Unwanted Visitors
Keeping pests and other unwanted visitors away from your diy test tube hummingbird feeder can be challenging.
Here are some ways to monitor and handle them effectively:
- Ants: Install an ant moat or barrier to block their way to the feeder. You can also apply a thin layer of petroleum jelly around the hanger or pole to deter them.
- Bees: Avoid using bright colors, particularly yellow and orange, as they attract bees. You can also hang a fake wasp nest near the feeder to deter them from invading.
- Squirrels: Hang the feeder at least ten feet above the ground or use a baffle to prevent squirrels from climbing.
By following these tips, you can ensure that your diy test tube hummingbird feeders remain clean and functional, providing a safe and healthy environment for these beautiful creatures to visit.
Affordable And Sustainable Alternatives To Commercial Feeders
Hummingbirds are one of nature’s most remarkable creatures. If you’re anything like us, seeing hummingbirds buzzing around your garden is a delightful experience.
Hummingbirds are fascinating little creatures that are always looking for nectar to feed on — why not help them out by making your own hummingbird feeder?
The Economic Benefits Of Building Your Own Feeders
Building your hummingbird feeder might take a little time, but the resulting satisfaction is worth it.
In addition, there are plenty of economic benefits, including:
- Creating a unique and personalized feeder to enjoy hummingbirds up close.
- Saving money compared to buying a commercial hummingbird feeder.
- Being able to reuse household items to create the feeder, thus keeping them out of the landfill.
The Environmental Impacts Of Reusing Common Household Products
The diy test tube hummingbird feeders are an environmentally friendly and sustainable option. You don’t need to buy a new hummingbird feeder, and you can use materials that you already have at home.
That means less waste, less pollution, and a lighter footprint on the environment.
Here are some of the environmental benefits:
- Reducing the amount of plastic and other waste produced from commercial feeders.
- Keeping common household items out of the landfill, such as test tubes, jars, and bottles.
- Extending the lifespan of materials by giving them a new purpose in your feeder.
Helping To Preserve Natural Habitats And Encourage Hummingbird Populations
Hummingbirds are important pollinators, and they help to keep our ecosystem healthy. However, they face challenges such as habitat loss and climate change.
By building your own feeder, you can help to encourage hummingbirds to visit your backyard, providing them with a safe haven and habitat.
Here are some of the ways that your feeder can help to preserve natural habitats:
- Providing a safe food source for hummingbirds, who might otherwise struggle to find enough nectar in areas affected by habitat loss.
- Creating a safe haven for hummingbirds in your backyard.
- Helping to support the hummingbird population by increasing their food supply.
Diy test tube hummingbird feeders are an affordable, environmentally friendly, and sustainable option for feeding hummingbirds.
They also provide a fun crafting project and offer the satisfaction of seeing these amazing creatures up close in your own backyard.
FAQ For DIY Test Tube Hummingbird Feeders
How Do You Make A Diy Test Tube Hummingbird Feeder?
What Is The Benefit Of Using A Test Tube Hummingbird Feeder?
How Often Should You Clean Your Test Tube Hummingbird Feeder?
What If Hummingbirds Don’T Visit My Test Tube Feeder?
Conclusion
By making your own diy test tube hummingbird feeders, you not only save money but also create an opportunity to closely observe these amazing creatures.
You can customize the feeders as per your liking and watch as your garden or balcony becomes a magnet for hummingbirds.
The process is fairly simple and can be completed with minimal effort using easily available materials. Additionally, it’s a great way to engage in a fun diy project with kids and teach them about the importance of taking care of nature.
Remember to maintain cleanliness and hygiene while filling the feeders and enjoy the unique experience of getting up close to these beautiful creatures. So, go ahead and give it a try, and let the hummingbirds add colour and joy to your life!

