How to Draw Hummingbird Easy: Step By Step!
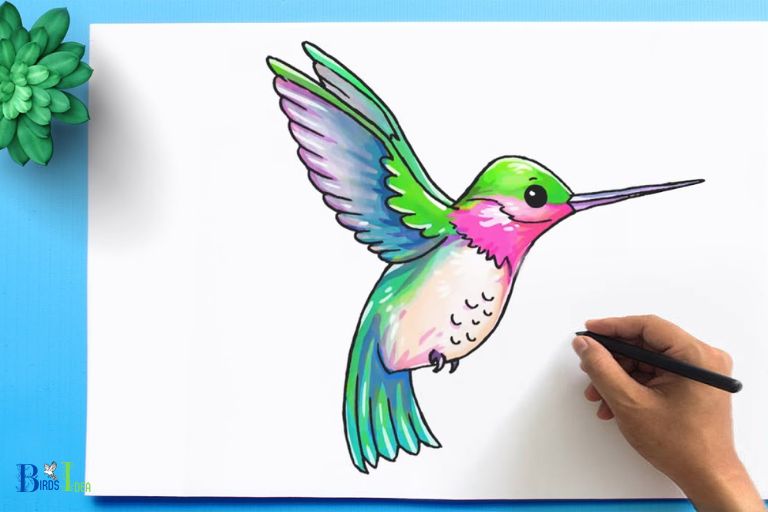
Drawing a hummingbird can be done easily by following these steps: first, sketch a basic outline of the hummingbird’s body; next, add details to the bird’s face, body, and wings; finally, color in your drawing to bring your hummingbird to life.
Drawing a hummingbird might seem complex due to its delicate and speedy nature, but by breaking down the process into simple steps, it becomes easy.
Start with a basic sketch of the bird’s body, which resembles a peanut shape. Then, add the details such as the eyes, beak, feathers, and wings.
Lastly, color in the drawing using vibrant colors typically associated with hummingbirds like green, blue, and red.
To help you get started, you can use a grid paper and draw the shape of the bird in pencil before adding any details. This will help you create clean and accurate detailing on your drawing.
Afterward, you can use a pen to carefully draw out each part, taking great care to ensure each line is as smooth and neat as possible.
Finally, use shading or color to add layers and bring your masterpiece to life!
10 Steps of Drawing Hummingbirds Easily
| Step Number | Instructions |
| 1 | Start by drawing a small circle for the hummingbird’s head. |
| 2 | Draw an oval attached to the circle, this will serve as the hummingbird’s body. |
| 3 | Draw a long beak; remember that hummingbird has a long, thin beak perfect for extracting nectar from flowers. |
| 4 | Draw two small circles on the head for the bird’s eyes. |
| 5 | Sketch the outline of the wings. They should be sweeping and slightly curved for a sense of motion. |
| 6 | Draw the tail, it should be short and pointy. |
| 7 | Draw the bird’s feet. A hummingbird’s feet are small because they mostly fly. |
| 8 | Add in details like feathers on the wings and body. |
| 9 | Outline your drawing with a fine pen or marker and erase the sketch lines. |
| 10 | Color the hummingbird. In nature, they can be very bright and colourful. |
Key Takeaway
Five Facts About: Drawing a Hummingbird
DID YOU KNOW
Hummingbirds can beat their wings up to 80–200 times per second.
Drawing a Hummingbird Step by Step
Drawing a hummingbird is an enjoyable activity which can be mastered with a few simple steps.
Here are the steps to draw a hummingbird:

- Sketch the shape of the body using curved lines.
- Add two wings using curved shapes.
- Draw the beak and tail using a curved triangle and a curved line respectively.
- Draw the eyes and feet.
- Add the details, including the feathers, to the wings and body.
- Give the hummingbird a background.
By following these steps, anyone can draw a realistic hummingbird. It is important to practice and practice until you are satisfied with the drawing. With practice and patience, you can create a beautiful drawing of a hummingbird.
Step 1: Sketch a Circular Shape With a Triangle Beak
Sketching a Circular Shape With a Triangle Beak is an easy, fun, and creative art project.
Here are the steps to follow for drawing this type of shape:

- Start by drawing two circles with a center point that is slightly lower than the circumference of the circles.
- Connect the two circles with a curved line and draw a triangle with a sharp point at the end.
- Add final details, such as eyes, nostrils, and feathers.
By following these simple steps, you can easily sketch a circular shape with a triangle beak that looks realistic and stylish. Have fun, be creative, and enjoy the process!
“Creativity is intelligence having fun.”
birdsidea
Step 2: Add Angled Wings On the Side of the Circle
Adding Angled Wings On the Side of the Circle is the second step of creating a butterfly. This step requires a few materials such as scissors, black sharpie, red sharpie, a ruler, and a piece of paper.
To begin, make two markings with the ruler on the left and right of the circle. Mark them 0.5 cm apart. Then, draw lines from each end of the markings that run slightly downwards.

Next, use the scissors to cut along the lines. The result should be two triangular wings that are slightly angled.
For the final step, use the black and red sharpies to color the wings. Use the black sharpie to draw a line down the middle of the wings and the red sharpie to fill color.
Congratulations! You have now successfully added angled wings on the side of the circle, completing the second step of creating a butterfly.
Step 3: Shade the Body and Wings to Create Outlines and Highlight the Edges
In this step, we will shade the body and wings of the butterfly to create outlines and highlight the edges.

- Start by lightly shading the butterfly body with a light-medium shade of the color you have chosen.
- Once you have covered the body, go back and shade the edges to give a slight outline to the butterfly.
- Shade the wings in the same manner, starting with a light shade and then adding a slightly darker shade to the edges.
- Finally, use a darker shade to bring out the highlights on the butterfly.
Shading the body and wings of the butterfly is a great way to create outlines and highlight the edges.
This will help bring the butterfly to life and help it look more realistic. With just a few simple steps, you can easily create an amazing looking butterfly.
Step 4: Include the Details of the Feathers and the Eyes
To create a realistic-looking peacock, you need to ensure that it has the correct details.
Here’s what you need to do:

- Feathers: Draw the feathers using a rainbow colored crayon. Start with the blue and green hues on the back, and then add yellow, orange and pink on the chest, and the tail.
- Eyes: Add two black eyes at the center of the face.
These details will give your peacock a realistic look. With the right colors and placement, you can create an exquisite peacock drawing!
Tips for Creating a Clean and Accurate Drawing
Creating accurate and clean drawings is essential for any design project.
Here are some tips to help you create the best drawing possible:

- Measure twice, cut once: Make sure you measure the desired dimensions of your drawing to ensure the accuracy of your design.
- Use a ruler and a straight edge: Using a ruler and straight edge will help you create clean lines and accurate measurements.
- Make sure your lines are clean: Small details can make or break a design, so take your time to make sure all your lines are clean and consistent.
- Take breaks: Working for long periods of time can lead to fatigue, which can cause drawings to become sloppy. Take frequent breaks to ensure your work stays accurate.
- Get a second opinion: Having a second opinion can help you identify elements that you may have missed. This can help you create an even more accurate drawing.
These tips are sure to help you create a clean and accurate drawing. With patience and precision, you will be able to create a design that is exactly what you had envisioned.
Benefits of Drawing a Hummingbird
Drawing a hummingbird can provide a number of benefits to those who practice it.
Some of these include:

Improved concentration and focus
Drawing requires the artist to pay close attention to the subject and the details, allowing them to hone their ability to stay focused for longer periods of time.
Stress relief
Drawing can be a great form of therapy, allowing the artist to express their feelings and emotions in a creative way. This can help reduce stress, frustration, and anxiety.
Enhanced motor skills
Drawing helps to develop and fine tune the ability to use the hands and fingers to create complex and intricate shapes.
Improved hand-eye coordination
Drawing requires practice in order to master the movement of the hand and the coordination of the eyes. This helps to develop better coordination and motor skills.
Overall, drawing a hummingbird can provide a number of mental and physical benefits to those who practice it.
It is a great way to express yourself, while also developing a number of skills that can be used in other areas of life.
Conclusion: How to Draw a Hummingbird Successfully
Hummingbirds are one of the most beautiful and fascinating birds in the world, and drawing them can be an enjoyable and rewarding experience.
To ensure success, there are some key steps that should be taken when drawing a hummingbird.

- Start by sketching the basic shape of the bird and its wings. Try to work quickly, as hummingbirds are able to move very quickly.
- Draw the tail feathers and head of the bird in detail, being sure to capture the unique features of the hummingbird, such as its long, thin beak and nectar-seeking tongue.
- Pay close attention to the small details of the feathers, such as the way they overlap and curve.
- Once the hummingbird’s features have been adequately captured, add details such as highlights and shadows to give the drawing a more realistic feel.
- Utilize a variety of colors to bring your hummingbird to life, such as light blues, greens, and purples.
With these steps in mind, it is possible to create an accurate and beautiful drawing of a hummingbird.
By taking the time to pay attention to the details and using a variety of colors, a realistic and eye-catching hummingbird can be created.
FAQ of How To Draw Hummingbird Easy
What tools do I need to draw a hummingbird?
What is the best way to start drawing a hummingbird?
Define the wings and feathers, and then add in the details such as eyes and feet.
How can I make the hummingbird look realistic?
What techniques can I use to make my hummingbird drawing look better?
You can also use blending tools such as blending sticks for a smoother finish.
How can I make sure my hummingbird drawing looks its best?
Make sure to erase any unnecessary lines and then outline your drawing for a clean finish.
Conclusion
With a few simple steps and some patience, anyone can easily create a well-crafted hummingbird drawing.
Through employing a combination of outlining, sketching, detailing and coloring, you can create a beautiful work of art!
#hummingbird #drawing #art #creativity #illustration

