How to Fill Glass Hummingbird Feeder: Step-by-Step!
Filling a glass hummingbird feeder involves several simple steps. First, remove the feeder from the hanging location and detach its bottom part.
Next, clean the feeder thoroughly before adding the sugar solution – a mixture of one part sugar to 4 parts water.
Pour the solution into the feeder through the opening and replace the bottom part. Lastly, rehang the feeder in the desired location.
The solution should be stirred until the sugar is fully dissolved. Next, it is important to check for leaks in the feeder’s reservoir and seal any openings that are found.
Therefore, before you add the sugar solution, ensure you clean and dry the feeder thoroughly.
Then, make your sugar solution, pour it into the feeder, and rehang it carefully.
Filling a glass hummingbird feeder is a practical way to attract these wonderful birds and a relatively easy process to undertake.
With the right materials and a few simple steps, enjoying these spectacular creatures can be made possible in the comfort of one’s backyard.
10 Steps to Filling a Glass Hummingbird Feeder
| Steps | Description |
| Step 1 | Purchase a Glass Hummingbird Feeder |
| Step 2 | Prepare the Nectar (4 parts water, 1 part white sugar) |
| Step 3 | Cool the Nectar |
| Step 4 | Remove the feeder from its hanger |
| Step 5 | Unscrew the base |
| Step 6 | Fill the feeder with the cooled nectar |
| Step 7 | Screw the base back on |
| Step 8 | Upside down the feeder carefully so as not to spill |
| Step 9 | Hang the feeder back to its position |
| Step 10 | Clean the feeder every 2-4 days |
Key Takeaway
Five Facts About: Filling a Glass Hummingbird Feeder
DID YOU KNOW
There are over 355 species of hummingbirds worldwide, and they are found exclusively in the Americas.
Filling a Glass Hummingbird Feeder
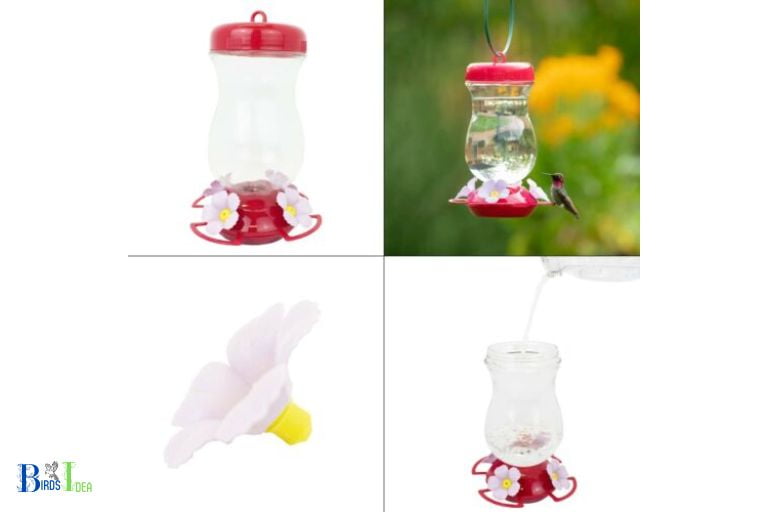
Filling a glass hummingbird feeder is a relatively simple process that requires a few basic materials.

Here are the steps to follow to fill a hummingbird feeder:
- Gather the necessary materials: a glass hummingbird feeder, sugar, water, and a stirring rod.
- Measure one part sugar to four parts warm water and stir until all the sugar dissolves.
- Fill the glass hummingbird feeder with the sugar water solution and be sure not to overfill.
- Hang the feeder in a location that is easily accessible to hummingbirds.
- Clean the feeder every two weeks or when the sugar water begins to turn cloudy.
Filling a glass hummingbird feeder is a simple process that will help attract hummingbirds to your yard or garden.
By following the steps outlined above and taking proper care of the feeder, you will soon be able to enjoy watching these small, beautiful birds feeding.
Preparation Needed to Fill the Feeder
The feeder needs to be prepared properly in order to accurately dispense the right amount of food.

Here are a few steps you can take to ensure that your feeder is properly filled:
- Check the feeder’s instructions to make sure you’re using the right type of food.
- Make sure the feeder is completely clean and free from dirt, dust, and other debris.
- Fill the feeder with the appropriate amount of food according to the instructions.
- Check the feeder for any signs of damage or wear and tear.
- Securely attach the feeder to a stable surface.
Following these steps will help ensure that your feeder is properly filled and that your pet is getting the right amount of food.
It’s important to check the feeder regularly to make sure it is working correctly and to keep it clean and free from debris.
“Let the beauty of what you love be what you do.”
birdsidea
Step-by-Step Guide on How to Fill the Feeder
Filling a feeder can be a simple and straightforward process if you know the right steps.
This guide will provide you with a step-by-step process on how to fill a feeder:

- Gather the supplies: You’ll need a scoop, feeder, and the type of feed you want to put in the feeder.
- Fill the Feeder: Use the scoop to fill the feeder with the chosen feed.
- Secure the Lid: Make sure to secure the lid of the feeder to keep out any critters.
- Place the Feeder: Place the feeder in a location that is accessible to the birds but away from other animals.
- Clear the Area: Make sure to clear the area around the feeder of any debris or other items that could interfere with the birds.
Following these steps will ensure that your feeder is filled properly and that the birds can access the feed safely and easily.
Pros and Benefits of Filling the Feeder
Feeders are a great way to provide animals with a steady supply of food in a convenient way.
They have many advantages, including:

Automated convenience: Feeders are designed to automatically dispense food, making it easy for pet owners to have their animals fed even when they are away or busy.
Easy refilling: Most feeders have lids or doors that can be opened for easy refilling. This eliminates the need for manual filling, which can be time-consuming and messy.
Cost savings: Feeders can save pet owners a significant amount of money in the long run. By having the feeder dispense a consistent amount of food, owners can prevent their animals from overeating, which can lead to health issues.
Reduced waste: Feeders help to reduce food waste since they dispense a consistent amount of food each time. This prevents food from being over-consumed by the animals or spilled onto the floor.
Overall, using a feeder is a great way to ensure that your pet is receiving a consistent diet in an automated and cost-effective manner.
Directions for Hanging The Feeder
Hanging your bird feeder is an easy task that can be completed in a few simple steps. It’s important to hang your feeder in a spot that’s convenient for both you and the birds.

- Determine a suitable location for your feeder. Choose a spot where the birds will be sheltered from the wind and rain and where they won’t be disturbed by predators.
- Make sure the area is in full sun or partial shade, and that it’s close to a water source.
- Measure the distance from the ground to where you would like to hang your feeder.
- Choose a secure place to hang the feeder. A tree branch is ideal, but you can also use a shepherd’s hook or wall-mounted bracket.
- Mount the feeder according to the manufacturer’s directions. Tighten the mount securely, and make sure it’s level.
- Pour bird seed into the feeder and enjoy watching the birds!
Tools Required for Refilling the Feeder
Refilling a feeder requires certain tools to complete the job safely and efficiently.
Here are some of the essential tools required to refill a feeder:

- A bucket to hold feed
- An auger to move the feed
- A rag to clean the feeder
- Gloves to protect your hands
- An electric screwdriver to open the feeder lid
These tools help make the process of refilling a feeder much easier. It is important to ensure you have all the necessary tools before attempting to refill a feeder.
Taking the time to prepare beforehand will ensure the job is completed quickly and effectively.
Safety Tips for Filling the Feeder
Safety is an important aspect of feeding our feathered friends.
Here are some tips to ensure safety while filling your feeder:

- Wear proper safety equipment, such as gloves and a mask, to prevent any contamination.
- Use a scoop or spoon to fill the feeder, rather than pouring the seed.
- Ensure the seed is fresh and free of mold and debris.
- Place the feeder away from birdhouses and nesting boxes, to prevent overcrowding.
- Clean the feeder regularly to prevent the buildup of bacteria.
- Keep the feeder away from any predators or sources of danger.
Taking these simple steps will ensure the safety of our feathered friends while they enjoy a delicious meal from your feeder
FAQ of How To Fill Glass Hummingbird Feeder
What do I need to fill a glass hummingbird feeder?
How often should I clean and refill the glass hummingbird feeder?
How do I make hummingbird nectar?
What should I do if the nectar isn’t being used quickly enough?
How much nectar should I fill the hummingbird feeder with?
Depending on the size of the hummingbird feeder, this may equate to between 1/3 to 1/2 cup of nectar.
Conclusion
Filling a glass hummingbird feeder is an easy task and an enjoyable way to bring these beautiful creatures to one’s garden.
The process consists of mixing the appropriate solution, checking for leakage, sealing any openings, and finally, hanging the feeder in the desired spot.
With a few simple steps, anyone can bring these marvels of nature closer to home.

