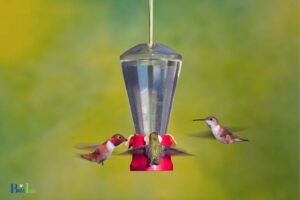
How to Fill a Tube Hummingbird Feeder: Efficient Process!
Filling a tube hummingbird feeder is a simple and efficient process that requires minimal effort. Tube hummingbird feeders are preferred by many bird enthusiasts due to their ease of use and minimal maintenance.
Following the correct steps ensures a clean and safe feeding environment for these delicate creatures, providing them with the energy they need to thrive.
Before filling the tube hummingbird feeder, make sure it is clean to prevent buildup of bacteria and mold that can harm the birds.
Next, prepare the hummingbird nectar by mixing one part white granulated sugar with four parts water; boiling and cooling it before use. To fill the feeder, remove the tube stopper and gently pour the nectar into the tube until it reaches the desired level.
Finally, secure the stopper and hang the feeder in a shady location, away from direct sunlight. Regularly check the nectar level and cleanliness of the feeder to ensure a safe and enjoyable feeding experience for the hummingbirds.
9 Steps to Fill a Tube Hummingbird Feeder:
| Step | Description |
| 1 | Purchase a tube hummingbird feeder. |
| 2 | Prepare the hummingbird nectar. Mix 1 part sugar with 4 parts water. |
| 3 | Boil the sugar-water mixture to sanitize and dissolve the sugar, then let it cool to room temperature. |
| 4 | Clean the feeder. Remove any residue or leftover nectar, wash with mild soapy water, and rinse thoroughly. |
| 5 | Fill the feeder tubes. Use a funnel or measuring cup to pour the cooled nectar into the tubes. |
| 6 | Install the feeding ends. Attach the feeding tips, plugs, or stoppers to seal the nectar tubes. |
| 7 | Position the feeder. Hang the feeder in a shaded location near flowers and trees, at least 4 feet off the ground. |
| 8 | Observe and maintain the feeder. Regularly clean and refill the feeder every few days, or when nectar levels run low. |
| 9 | Store extra nectar. Keep any leftover nectar in the refrigerator for up to two weeks. |
Key Takeaway
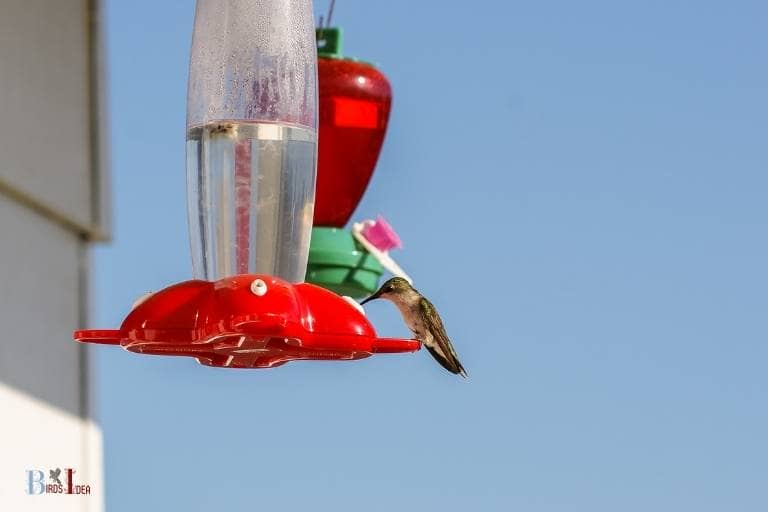
Five Facts About: Fill a Tube Hummingbird Feeder
Understanding The Hummingbird Feeder
Hummingbirds are delightful creatures, and they brighten up any garden with their vibrant colors and playful antics. To attract these tiny wonders, many nature lovers opt for hummingbird feeders.
However, filling and maintaining these feeders can be a daunting task.
In this blog post, we will dive into the process of filling a tube hummingbird feeder, starting with understanding the feeder itself.
Types Of Hummingbird Feeders
Hummingbird feeders come in different types and sizes, but they all work on the same principle of providing a nectar solution that resembles the one found in flowers.
The three main types of hummingbird feeders are:
- Tube feeders
- Dish feeders
- Bottle feeders
For this article, let’s focus on the tube hummingbird feeder.
Advantages Of Tube Hummingbird Feeders
Tube hummingbird feeders are popular among bird enthusiasts because of their practical design, simplicity, and durability.
Here are some key advantages of using a tube feeder:
- They are easy to clean and maintain.
- They are generally sturdy and can withstand harsh weather conditions.
- They have fewer parts than other feeder types, making them less prone to breakage.
- They are the best choice if you have a lot of hummingbirds to feed, as they typically have a larger capacity than dish or bottle feeders. Whenever possible, choose a feeder that holds at least 16-ounce solution.
When purchasing a tube hummingbird feeder, choose one with a locking mechanism that secures the lid onto the base. This will prevent it from falling off, causing the nectar solution to spill, and potentially attracting ants.
Tube hummingbird feeders are a great choice for anyone hoping to attract hummingbirds to their yard or garden.
Understanding the benefits of these feeders will help you to make an informed purchasing decision and enjoy the bird watching experience to the fullest.
Before You Start
Safety Precautions For Handling Nectar
Before starting to fill your tube hummingbird feeder, it’s crucial to take some safety precautions to protect both yourself and the birds.
Here are some essential tips you shouldn’t overlook:
- Always wear gloves when handling nectar to prevent any contamination from your skin, and make sure your hands are clean before inserting them into the feeder.
- Store your nectar mix in a secure, labelled, and dated container. This makes it easy to keep track of the shelf life of your nectar.
- Use only food-grade dye-free nectar to avoid exposing birds to harmful chemicals.
- Start by cleaning your feeder thoroughly and rinsing it with hot water before filling it with new nectar.
- Clear any nectar spills as soon as they occur to avoid attracting ants or wasps.
Preparing Your Work Area
Setting up your work area before you start to fill a tube hummingbird feeder will make the process go smoothly.
The following steps will help you prepare your workspace:
- Clean the feeding station and place it on a flat surface.
- Gather all the necessary supplies, including a measuring cup or funnel, a clean container for storing leftover nectar, gloves and a dishrag.
- Choose a convenient location for preparing the nectar, such as your kitchen counter, and ensure that it’s well-ventilated to avoid getting overwhelmed by the aroma of the nectar.
When you’ve finished preparing your workspace, you’re all set to begin filling your tube hummingbird feeder with delicious nectar that will attract dozens of beautiful birds!
Steps To Fill A Tube Hummingbird Feeder
Filling a tube hummingbird feeder can be a fun and rewarding way to attract these beautiful birds to your garden or backyard. However, it’s essential to know the correct steps to ensure that you provide a safe and healthy environment for these feathered friends.
In this blog post, we’ll take you through the steps of filling a tube hummingbird feeder and offer you some tips to get it right every time. So, let’s start with step one.
Step 1 – Clean Your Feeder And Equipment
Before filling your tube hummingbird feeder, it’s crucial to ensure that all the equipment you plan to use is clean and ready to use.
Follow these steps to clean your feeder and utensils:
- Remove any old sugar water from your feeder, and discard it.
- Take the feeder apart, if possible, and wash it with warm water and dish soap. Use a small brush to get into any crevices.
- Rinse the feeder thoroughly, ensuring that there is no soap residue left behind.
- Sterilize the feeder by filling it with a 50/50 solution of white vinegar and water. Let it sit for 10 minutes before rinsing it again with clean water.
- Clean your utensils, including your measuring cup, with soap and water or run them through the dishwasher.
Step 2 – Create The Sugar Water Solution
Creating the sugar water solution is the most important step in this process. Hummingbirds need a diet of nectar, which is a mixture of 4 parts water to 1 part white granulated sugar.
Here’s how to make it:
- Measure out 1 part white granulated sugar and 4 parts water, ensuring that your measuring cup is clean.
- Boil the water, and then add the sugar to the boiling water, stirring until the sugar dissolves.
- Let the sugar water cool before filling your feeder.
Step 3 – Fill The Feeder
Now that you have your sugar water solution ready, it’s time to fill your feeder.
Follow these steps to fill your feeder safely:
- Pour the cooled sugar water solution into your clean feeder, filling it no more than two-thirds full.
- Wipe down any excess sugar water that may have spilled on the outside of the feeder.
- Check that the feeder is assembled correctly, and there are no leaks in the feeder.
- Screw the cap back onto the feeder tightly.
Step 4 – Hang Your Feeder
Your tube hummingbird feeder is now full, and it’s time to hang it up in a safe and suitable location.
Follow these tips for hanging your filled tube hummingbird feeder:
- Place the feeder in a shady area.
- Check to see that the feeder is not in direct sunlight.
- Make sure the feeder is at least five feet off the ground.
- Hang the feeder from a sturdy hook securely.
- Clean and refill your feeder regularly, every three to four days.
By following these easy steps, you can now safely and easily fill your tube hummingbird feeder and enjoy watching these beautiful birds feast on nectar.
Remember to keep your feeder clean and full of fresh sugar water to ensure your feathered friends keep coming back.
Happy hummingbird watching!
Tips And Tricks For Successful Feeding
Filling a tube hummingbird feeder is a fun and exciting experience for nature enthusiasts. However, there are some tips and tricks that you should know to ensure a successful feeding session.
Here are some key points regarding maintaining the feeder, proper placement of the feeder for hummingbirds, and enhancing your hummingbird feeding experience.
Maintaining The Feeder
- Always clean the feeder with hot water and dish soap before filling it with fresh nectar each time.
- Be sure to replace the nectar regularly to avoid contamination.
- If you notice any mold growth or discoloration in the nectar, dispose of it immediately and clean the feeder thoroughly before using it again.
- To avoid attracting ants, invest in an ant guard or barrier to place on the feeder pole.
Proper Placement Of The Feeder For Hummingbirds
- Place the feeder in a shaded area to keep the nectar fresh for a longer period.
- Hang the feeder at least 4 feet from the ground to keep it away from predators such as cats.
- Choose a spot that is easily visible to hummingbirds and remember to refill the feeder regularly to ensure they keep coming back.
- Consider placing the feeder near flowers or a natural nectar source to attract more hummingbirds.
Enhancing Your Hummingbird Feeding Experience
- Plant flowers such as petunias and fuchsias in your garden to create a natural hummingbird habitat.
- Hang multiple feeders in your backyard to attract more hummingbirds and reduce territorial disputes.
- Offer a variety of nectar flavors such as grape and cherry to cater to the hummingbirds’ tastes.
- Use a camera or binoculars to get a closer look at these beautiful creatures.
- Enjoy the calming and relaxing experience of watching hummingbirds up close.
By following these tips and tricks, you will surely have a successful and enjoyable hummingbird feeding experience.
Remember to maintain the feeder, properly place it for hummingbirds, and enhance your backyard habitat to attract more of these fascinating creatures.
FAQ Of How To Fill A Tube Hummingbird Feeder
How Often Should I Refill My Hummingbird Feeder?
What Is The Best Way To Clean My Feeder?
What Type Of Nectar Should I Use For My Feeder?
How Can I Deter Bees And Wasps From My Feeder?
Conclusion
Filling a tube hummingbird feeder is not a difficult task, but it does require some patience and attention to detail. Keep the feeder clean and filled with fresh nectar to attract these beautiful birds to your yard.
Remember to use the 4:1 water to sugar ratio and avoid using food coloring or artificial sweeteners.
Try using a funnel or a turkey baster to make filling the feeder less messy. Now that you know how to fill a tube hummingbird feeder, you can sit back and enjoy watching these amazing creatures buzz around your yard.
Don’t forget to regularly clean and refill the feeder to ensure the birds keep coming back. With these tips, you’ll be able to provide a safe and nourishing environment for hummingbirds to thrive in your garden.

