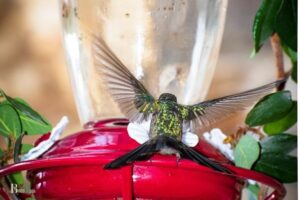
Hummingbird Feeder How to Make: Easy Guide!
To make a hummingbird feeder, you need a small container, a feeding tube or spout, sugar water, and hanging materials.
Creating a hummingbird feeder attracts and provides nourishment to these tiny, fast-flapping birds while allowing you to observe them up close.
Evolution has favored their capacity to hover and fly at high speeds over the ability to walk.
Their tiny legs, while seemingly a disadvantage, are actually a sign of these birds’ remarkable adaptiveness.
7 Steps to Hummingbird Feeder Making Process
| Step | Materials Needed | Instructions |
|---|---|---|
| 1 | Plastic bottle or glass container, string or wire | Choose a container for the hummingbird feeder, such as a plastic bottle or small glass container. Attach the string or wire to the container for hanging. |
| 2 | Red paint, tape, or ribbon | Add red accents to the outside of the container, as hummingbirds are attracted to the color red. You can use paint, tape, or ribbon to achieve this. |
| 3 | Sugar, water | Make the hummingbird food by mixing a 1:4 ratio of sugar to water. For example, combine 1 cup of sugar with 4 cups of water. Stir until the sugar is dissolved. |
| 4 | Small container lid or plastic plate | Create a feeding platform by attaching a small container lid or plastic plate to the bottom of the container. This will hold the sugar water and provide a place for the hummingbirds to perch. |
| 5 | Small holes, drill or sharp object | Make small holes in the container lid or plastic plate for the hummingbirds to access the sugar water. Use a drill or sharp object to create the holes, ensuring they are large enough for the hummingbirds’ beaks. |
| 6 | Sugar water, container | Fill the container with the prepared sugar water, ensuring it reaches the holes in the feeding platform. |
| 7 | Hanging location, feeder | Hang the feeder in a location where hummingbirds frequent, such as near flowers, bushes, or trees. Check and refill the feeder regularly to keep the hummingbirds coming back. |
Key Takeaway
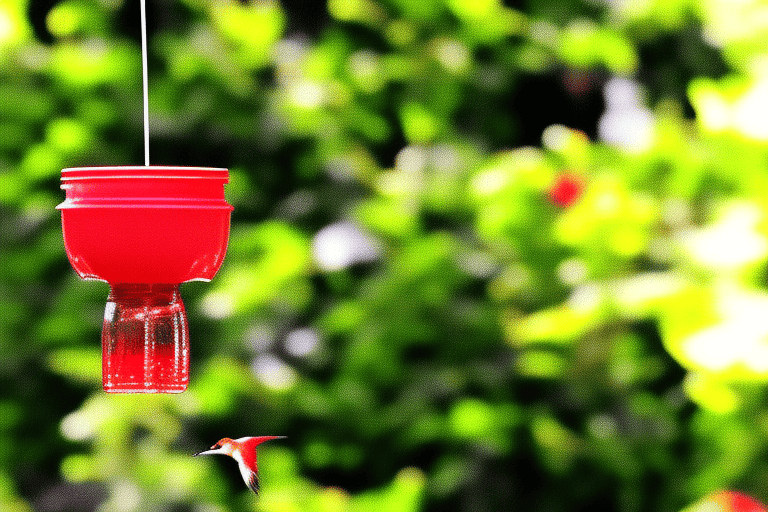
Five Facts About: Hummingbird Feeder
Tips for Making and Placing the DIY hummingbird feeder
Creating a DIY hummingbird feeder is an excellent way to provide food for these delightful creatures while also enjoying the beauty of their presence in your yard.
When making and placing a hummingbird feeder, it is essential to consider the materials, design, and location to ensure a successful and enjoyable experience for both you and the hummingbirds.
Here are some tips to help you make and place the best DIY hummingbird feeder:
- Use safe and durable materials: Opt for materials that are non-toxic and weather-resistant, such as food-grade plastic or glass.
- Choose a simple and effective design: Ensure that the feeder has a bright red color, which is attractive to hummingbirds, and includes multiple feeding ports.
- Keep the feeder clean and filled: Regularly clean the feeder to prevent mold or bacterial growth and refill it with fresh nectar.
- Place the feeder in an ideal location: Select a spot with nearby perching spots for the birds, and position the feeder at least 4 feet off the ground to deter predators.
What You Need to Make a Hummingbird Feeder at Home
Making a hummingbird feeder at home is a simple and cost-effective way to attract these delightful birds to your garden.
With just a few materials, you can create an inviting space for hummingbirds to visit and enjoy.
Homemade feeders also allow you to customize the design and functionality to better suit your needs and preferences.
Here are the essential items you need to make your own hummingbird feeder at home:
- A clean, empty container (plastic bottle, mason jar, or small glass bottle)
- A red feeding tube or flower-shaped feeding port (available online or at pet stores)
- String, wire, or chain for hanging the feeder
- A small plate, saucer, or lid for the base (to catch any drips and provide a landing platform for the birds)
- Sugar and water for making the nectar solution
- Optional: decorative elements, such as paint, stickers, or beads to personalize your feeder
DID YOU KNOW
According to a study by the U.S. Fish and Wildlife Service, hummingbirds are able to remember every flower they have ever visited and how long it will take for each flower to refill with nectar.
birdsidea
Materials Needed to Create a Suitable Hummingbird Feeder
Creating a suitable hummingbird feeder at home is a great way to attract these fascinating creatures to your garden.
To make the most effective hummingbird feeder, you will need specific materials and components that ensure the feeder dispenses nectar safely and efficiently, keeping the hummingbirds coming back for more.
Here is a list of materials you will need to create a suitable hummingbird feeder:
- A clean plastic or glass container with a tight-fitting lid
- A feeding tube, which can be purchased at a local pet store or online
- Red ribbon, paint, or other bright adornments to attract hummingbirds
- A hanger or hook for mounting the feeder
- Hummingbird nectar, which can be homemade or store-bought
Making Your Own Hummingbird Feeder from Scratch
Making your own hummingbird feeder from scratch is a fun and budget-friendly project that not only attracts these beautiful birds to your garden but also creates a personalized touch to your outdoor space.
Homemade hummingbird feeders can be made using various readily available materials. By following a few simple steps, you can create an attractive and functional feeder that suits your specific needs and preferences.
Here are the materials and steps to make your own hummingbird feeder:
Materials:
- A clean plastic or glass bottle with a tight-fitting lid
- A plastic or metal feeding tube (can be purchased at a pet store or online)
- A small saucer or shallow dish
- Water
- White granulated sugar (not honey, syrup, or artificial sweeteners)
- Red coloring, ribbon, or paint (optional)
Steps:
- Prepare the sugar solution by boiling 1 part sugar in 4 parts water until sugar dissolves. Let it cool before using it in the feeder.
- Drill a small hole in the center of the lid, just big enough for the feeding tube. Insert the feeding tube and ensure it fits snugly.
- Fill the bottle with the prepared sugar solution, and secure the lid firmly.
- Attach the saucer or dish to the feeding tube, ensuring it is level and stable. This will serve as the feeding platform for the hummingbirds.
- If desired, add red coloring, ribbon, or paint to the exterior of the bottle to make it more attractive to the birds. Do not add coloring to the sugar solution, as it can be harmful to the birds.
- Hang the feeder in a shady spot in your garden, away from predators and wind, at least 5 feet above the ground.
- Clean and refill the feeder regularly to maintain a fresh sugar supply and prevent mold.
Tips:
- Hummingbirds are attracted to red, so using red decorations can help to draw them to your feeder.
- Avoid using pesticides in your garden, as they can harm hummingbirds and their food sources.
- Planting native flowers rich in nectar can also help attract hummingbirds to your garden.
By creating your own hummingbird feeder and following these steps, you can provide a safe and inviting spot for these colorful birds to visit frequently, brightening up your garden and helping the local hummingbird population.
The Benefits Of Making a Hummingbird Feeder
Making a hummingbird feeder is not only an enjoyable DIY project, but it also offers significant benefits for both the hummingbirds and the environment.
By creating a feeder from scratch, you provide a valuable food source for these tiny creatures, encouraging them to frequent your garden.
Furthermore, hummingbird feeders contribute to the conservation of these beautiful birds by supporting their population and providing a safe space for them to feed.
- Attracts hummingbirds to your garden, adding color and life
- Provides a consistent food source, especially during migration
- Supports hummingbird population
- Encourages pollination, benefiting plants
- Reduces reliance on store-bought feeders, promoting sustainability
Tips For Placing a Hummingbird Feeder In Your Garden
Placing a hummingbird feeder in your garden is an excellent way to attract these fascinating birds to your outdoor space, providing them with a reliable food source while allowing you to enjoy their beauty and intriguing behavior.
To create an appealing environment for hummingbirds and maximize the benefits of your feeder, consider the following tips to properly place it in your garden:
- Choose a sheltered location: Install the feeder in a spot protected from strong winds and harsh weather conditions, such as under a tree or near a bush, to provide the birds with some security.
- Ensure good visibility: Place the feeder where you can easily see it from a window or comfortable seating area in your garden, so you can enjoy watching the hummingbirds visit.
- Keep it away from predators: Avoid hanging the feeder near areas where cats or other predators might lurk, such as close to the ground or near dense shrubs.
- Provide nearby perches: Hummingbirds appreciate resting on nearby branches, so position the feeder near a tree or shrub with plenty of perching spots.
- Maintain cleanliness: Regularly cleaning the feeder and changing the nectar helps prevent mold and bacterial growth, which can be harmful to the birds. Choose an accessible location to make this process easier.
- Plant native flowers: To further attract hummingbirds, incorporate native flowering plants in your garden that produce nectar rich in nutrients.
Remember, making your garden more attractive to hummingbirds may require some trial and error, so be patient and adjust the feeder’s position as needed to achieve the best results.
Cleaning and Maintaining the Hummingbird Feeder
To ensure the health and happiness of hummingbirds, keeping their feeder clean and well-maintained is essential.
A clean hummingbird feeder will help prevent the growth of mold and bacteria, which could be harmful to the birds.
Additionally, maintaining the feeder ensures that it functions properly and provides a consistent source of nectar for the hummingbirds.
Periodic cleaning and inspection are necessary for the ideal maintenance of a hummingbird feeder.
Here are some key steps for cleaning and maintaining your hummingbird feeder:
- Empty the feeder: Dispose of any leftover nectar, as it can grow mold and bacteria if left out for too long.
- Disassemble the feeder: Remove all parts and accessories, such as the base, ports, and perches, to access and clean all surfaces effectively.
- Soak in warm, soapy water: Soak all feeder components in a solution of warm water and mild dish soap for about 10 minutes.
- Scrub with a brush: Use a small brush to scrub all parts of the feeder, including the feeding ports and base, to remove any mold and debris.
- Rinse thoroughly: Rinse all parts with clean, warm water to remove any soap residue.
- Air-dry completely: Allow the feeder components to air-dry completely before reassembling and refilling with fresh nectar.
- Inspect regularly: Check the feeder for damage, such as cracks and leaks, and replace any damaged parts as needed.
Signs You Need to Replace or Repair Your Hummingbird Feeder
If you have recently made a hummingbird feeder or have been using one for some time, it’s essential to know when it might be time to repair or replace it.
An ideal feeder should be structurally sound, clean, and able to safely provide hummingbirds with food without posing any harm.
Keep an eye out for the following signs that indicate a need for repair or replacement.
- Cracks or leaks in the feeder
- Mold or mildew growth
- Warped or damaged parts
- Discolored or faded feeder
- Difficulty in cleaning and maintaining the feeder
- Hummingbirds not visiting the feeder anymore
“Hummingbirds are a joy to watch and can help with pollination in your garden.”
birdsidea
How to Attract Hummingbirds to Your Feeder?
Attracting hummingbirds to your feeder can be easily achieved by providing an inviting and safe environment that caters to their needs.
Hummingbirds are drawn to bright colors, nectar-rich flowers, and clean, fresh water sources. By incorporating these elements, you can make your feeder a hummingbird haven.
Additionally, maintaining the cleanliness of your feeder and providing a consistent food source will also encourage frequent visits from these fascinating small birds.
Here are some tips to make your hummingbird feeder more attractive:
- Choose a brightly colored feeder, preferably red, which is a color that hummingbirds are naturally drawn to.
- Fill your feeder with a homemade nectar solution, made from mixing 1 part sugar with 4 parts water. Avoid using red dye, honey, or artificial sweeteners as these can be harmful to the birds.
- Hang your feeder in a shaded spot away from direct sunlight, as high temperatures can cause the nectar to spoil quickly.
- Provide perching spots such as branches and shrubs nearby to allow the birds to rest between feedings.
- Add a water source, like a shallow dish or fountain, so that hummingbirds can drink and bathe.
- Plant nectar-rich flowers around the feeder to attract more hummingbirds and provide an additional food source.
- Clean your feeder regularly to prevent the growth of mold and bacteria.
- Make sure to refill your feeder consistently, as hummingbirds may move on if there is a lack of available nectar.
Hummingbirds are territorial and may fight over a single feeder. You can help reduce competition by having multiple feeders to accommodate more birds.
Additionally, offer a variety of flowers and natural food sources that will attract different species of hummingbirds, and you’ll maximize the hummingbird activity in your yard.
FAQ of Hummingbird Feeder How To Make
What materials do I need to make a hummingbird feeder?
How much sugar should I use for the mixture?
How do I make the mixture?
How often should I change the mixture in the feeder?
Conclusion
In conclusion, making a hummingbird feeder at home is an easy and rewarding DIY project that can enhance the beauty of your garden and provide a source of entertainment as you attract these delightful birds.
With the right materials and placement, you can create a suitable hummingbird feeder that not only attracts these birds but also keeps them safe and healthy.
Additionally, it’s essential to regularly clean and maintain the feeder and replace or repair it if necessary.
By following the tips and instructions provided, you can enjoy the benefits of watching hummingbirds feed and flutter around in your garden while maintaining a healthy and sustainable habitat for them.

