DIY Ant Moat for Hummingbird Feeders: 7 Steps!
A DIY ant moat for hummingbird feeders is a simple, homemade device designed to prevent ants from accessing the feeder’s nectar.
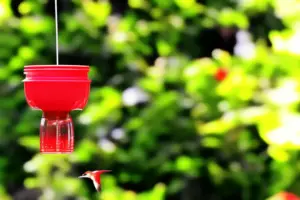
Essentially, the ant moat is a small container filled with water that is hung above the hummingbird feeder.
Ants, which are attracted to the sugar water in the feeder, will climb down the string but won’t be able to cross the water in the moat.
This keeps your hummingbird feeder ant-free.
A DIY ant moat requires just a few basic items like a plastic bottle cap, wire, and small container to make a water-filled barrier that deters ants from reaching the hummingbird feeder.
This solution is not only effective and affordable but also safe for the environment and your hummingbirds, ensuring your feathered visitors continue to enjoy their meals, pest-free.
7 Steps of DIY Ant Moat for Hummingbird Feeders
| Step | Materials | Instructions |
|---|---|---|
| 1 | Plastic lid or small container | Find a plastic lid or small container that is larger than the hummingbird feeder’s hook or hanger. |
| 2 | Fishing line or string | Cut a piece of fishing line or string that is at least 12 inches long. |
| 3 | Scissors | Use scissors to carefully cut a small hole in the center of the plastic lid or container. |
| 4 | Waterproof sealant | Apply waterproof sealant around the hole to prevent water from leaking out. Let it dry according to the sealant’s instructions. |
| 5 | Fishing line or string | Thread the fishing line or string through the hole in the plastic lid or container. Tie a secure knot at the end of the line or string that will be inside the container. |
| 6 | Water | Fill the plastic lid or container with water, ensuring that the knot is submerged. |
| 7 | Hummingbird feeder | Attach the other end of the fishing line or string to the hummingbird feeder’s hook or hanger. Make sure the ant moat is positioned above the feeder. |
| 8 | Hanging location | Hang the hummingbird feeder with the DIY ant moat in a suitable location. The water in the moat will prevent ants from reaching the feeder. |
Key Takeaway
Five Facts About: DIY Ant Moat For Hummingbird Feeders
Tips for DIY Ant Moat for Hummingbird Feeders
A DIY ant moat is a simple and effective way to keep ants away from your hummingbird feeders without using harmful chemicals.
By creating a barrier of water, which ants cannot cross, the moat prevents them from reaching the nectar in the feeder.
Making your own ant moat is an affordable and eco-friendly solution that requires just a few materials and basic tools.
To make your own DIY ant moat, follow these steps:
- Gather materials: You will need a small plastic container with a lid (such as a pill bottle), a small hook or wire, waterproof glue or silicone sealant, and a piece of string or fishing line.
- Drill holes: Carefully drill a hole in the center of the container lid and another in the bottom of the container. The holes should be just large enough for the string or fishing line to pass through.
- Attach the hook or wire: Secure the hook or wire to the inside of the lid using waterproof glue or silicone sealant. Allow it to dry completely.
- Thread the string: Thread the string or fishing line through the holes in the lid and container, tying a knot at the end inside the container to prevent it from slipping out.
- Fill with water: Add water to the container, close the lid tightly, and hang it above your hummingbird feeder. The water-filled moat will prevent ants from reaching the feeder.
Pro tips:
- Choose a container with a tight-fitting lid to minimize evaporation and reduce the need for frequent refilling.
- To further deter ants, add a few drops of liquid dish soap to the water in the moat. This will make it more difficult for ants to cross and also make it easier for them to slip and fall into the water.
- Regularly check and refill the moat to ensure it remains effective in keeping ants away from your hummingbird feeder.
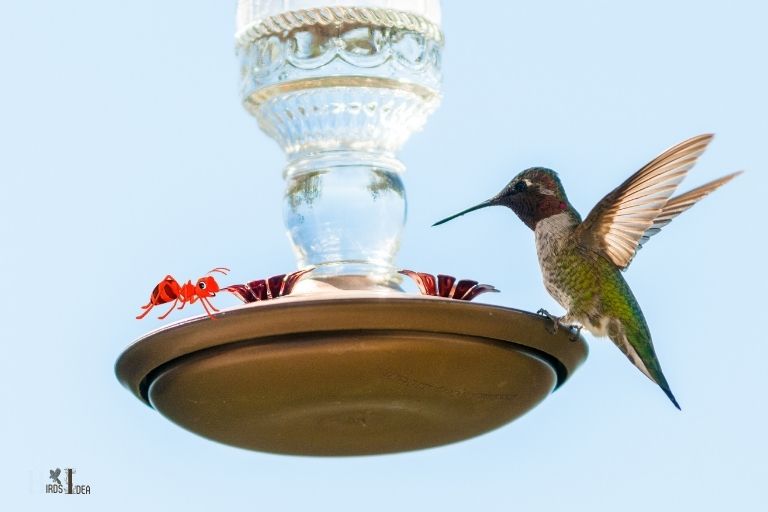
“Ants can crawl up the pole and into the feeder, contaminating the nectar and potentially harming the hummingbirds,” says experts from Audubon.
birdsidea
DIY Hummingbird Feeder Ant Moat Projects
Creating a DIY ant moat for your hummingbird feeder is a simple and effective way to prevent ants from reaching the nectar and bothering the birds.
By placing a barrier filled with water between the feeder and the hook or branch it hangs from, ants are unable to cross, ensuring a clean and inviting environment for hummingbirds.
The best part is that you can make an ant moat using materials you most likely already have at home.
Here are some different methods to create a DIY hummingbird feeder ant moat:
- Bottle Cap Method:
- Use a plastic bottle cap and a short piece of wire or string.
- Attach the cap to the wire or string, and secure it above the feeder.
- Fill the cap with water, and ants will be unable to cross.
- Plastic Cup Method:
- Use a small plastic cup, a hole punch, and wire or string
- Punch a hole in the center of the bottom of the cup
- Thread the wire or string through the hole, and secure the cup above the feeder
- Fill the cup with water, and ants will be unable to cross
- PVC Pipe Method:
- Use a short piece of PVC pipe, two end caps, and a threaded hook
- Glue one end cap to each end of the pipe, and screw the hook into the top cap
- Hang the pipe above the feeder, and fill it with water, creating a moat that ants cannot cross
- Fishing Line Method:
- Use fishing line and petroleum jelly
- Wrap fishing line around the branch or hook that the feeder hangs from
- Apply petroleum jelly to the line, creating a slippery barrier that ants cannot cross
Remember to keep the water in your ant moat clean and change it periodically to avoid the growth of algae and mosquitoes.
birdsidea
Different Materials Required to Create an Ant Moat for a Hummingbird Feeder
Creating an ant moat for a hummingbird feeder is an effective and simple way to keep ants away from the nectar.
By using a few basic materials, you can easily construct a DIY ant moat to protect your hummingbird feeder from ants.
The various materials required to create an ant moat include:
- A small plastic container or lid
- A small hook or bent wire
- A hanging cord or string
- Water
- Hummingbird feeder
To create an ant moat, first, make a hole in the center of the small plastic container or lid. Then attach the hook or bent wire to the container, making sure it securely hangs from the hole.
Fill the container with water to create a barrier for ants. Finally, attach the hanging cord or string to the hook or bent wire and hang the hummingbird feeder below the ant moat.
Step-by-Step Guide to Building an Ant Moat for a Hummingbird Feeder
Creating a DIY ant moat for your hummingbird feeder is an effective and cost-friendly solution to prevent ants from reaching the feeder and stealing the sweet nectar your hummingbirds love.
Building an ant moat is a simple project that requires minimal materials and tools. Follow this step-by-step guide to create an ant moat for your hummingbird feeder and keep those pesky ants at bay.
Materials you will need:
- A small plastic container with a lid (e.g., a film canister or a small food container)
- A small screw hook
- Thread or fishing line
- A drill or a small awl
Instructions:
- Drill a small hole in the center of the lid of the plastic container (about the size of the screw hook).
- Drill another small hole in the bottom of the container.
- Screw the hook into the hole in the lid, making sure it is secure and tight.
- Thread the fishing line or thread through the hole in the bottom of the container and tie a knot large enough to prevent it from slipping through the hole.
- Fill the container with water. The water will act as a barrier, preventing ants from crossing over to the feeder.
- Attach the moat to the hummingbird feeder by hanging the feeder from the hook. Hang the thread or fishing line from a branch or other support.
- Periodically check and refill the moat to ensure it is always full of water.
Benefits of an Ant Moat for Hummingbird Feeders
Installing an ant moat on your hummingbird feeder is a great DIY solution to protect the nectar from ants and other crawling insects.
\Ants are notorious for invading hummingbird feeders, and their presence can deter hummingbirds from visiting your yard.
An ant moat prevents ants from reaching the nectar, ensuring your little feathered friends can enjoy their meals in peace.
Additionally, ant moats are non-toxic and more environmentally friendly than using pesticides or other chemicals to deter ants.
- Keeps ants and crawling insects away from the nectar
- Promotes a cleaner feeding environment for hummingbirds
- Non-toxic and environmentally friendly solution
- Simple and cost-effective DIY project
- Helps maintain the feeder’s attractiveness to hummingbird
DID YOU KNOW
According to a study, more than 40% of hummingbird feeders are contaminated with mold and bacteria due to the presence of ants.
birdsidea
Tips for Maintaining a DIY Ant Moat for Hummingbird Feeders
Maintaining a DIY ant moat for hummingbird feeders is essential for keeping ants at bay and ensuring your hummingbirds can enjoy their nectar without any disturbance.
A well-maintained ant moat will not only prevent ants from reaching the feeder but also prolong the life of the feeder itself.
It is crucial to follow proper maintenance tips to maximize the effectiveness of your DIY ant moat and provide a safe, ant-free environment for hummingbirds.
- Regularly check and refill the moat with water
- Clean the moat to prevent the growth of algae or mold
- Monitor the moat for damage, such as leaks or cracks
- Keep surrounding vegetation trimmed to discourage ant access
- Ensure the feeder is securely hung to prevent tipping or spilling
How do you make a hummingbird feeder ant moat?
To make a hummingbird feeder ant moat, you will need some common household items and a few tools.
The ant moat is a small device that helps keep ants from invading the nectar in the hummingbird feeder.
Here are the steps to make an ant moat:
- Gather materials: You will need a plastic container with a lid, a hook or string, and water.
- Drill a hole: Drill a small hole in the lid of the plastic container.
- Fill with water: Fill the container with water, leaving some space for the lid.
- Attach the hook: Attach a hook or string to the container.
- Hang the ant moat: Hang the container above the hummingbird feeder so that the string or hook goes through the drilled hole.
- Check and refill: Check the ant moat regularly to ensure that it is full of water, and refill as needed.
With these simple steps, you can make an effective ant moat to protect the hummingbird feeder and keep ants away.
What liquid do you put in an ant moat for hummingbird feeder?
To keep ants away from hummingbird feeders, you can make a DIY ant moat that you hang above the feeder.
The ant moat is filled with a liquid that the ants can’t cross. To fill the ant moat, you can use a few different liquids that are safe for hummingbirds.
Here are some options:
- Water
- Vegetable oil
- Mineral oil
- Canola oil
Whichever liquid you choose, pour it into the ant moat and hang it above the hummingbird feeder.
The ants will be unable to cross the moat and will not be able to reach the feeder. This helps ensure that hummingbirds can enjoy their food without having to compete with ants for it.
How much water do you put in an ant moat?
When making a DIY ant moat for your hummingbird feeders, it’s important to know how much water to put in it to ensure its effectiveness.
An ant moat works by creating a barrier of water around the feeder, preventing ants from crawling onto it.
The amount of water you need to put in the ant moat depends on the size of the feeder. Typically, 1/4 inch of water in the moat is enough to repel ants.
It’s important to check the water level regularly and refill it as needed, especially during hot weather when water can evaporate quickly.
Keeping the ant moat filled with water is essential to keep ants away from your hummingbird feeders.
Here are some additional tips for using an ant moat for hummingbird feeders:
- Place the ant moat between the feeder and the hook or hanger to create an effective barrier.
- Clean the ant moat regularly to prevent mold or bacteria buildup.
- Consider using a clear ant moat, so you can easily see when it needs to be refilled.
- If you notice ants still crawling onto the feeder, try moving the entire setup to a different location.
How do you make a DIY hummingbird feeder?
If you want to make a DIY hummingbird feeder, it can be a fun and rewarding project. However, it’s important to take steps to prevent ants from getting into the feeder, as they can contaminate the nectar and harm the birds.
One way to do this is by creating a DIY ant moat for your hummingbird feeder.
Here’s how you can make one:
- Find a small, shallow dish that’s wider than the diameter of your feeder.
- Drill a small hole near the edge of the dish.
- Thread a piece of string or fishing line through the hole and tie a knot underneath the dish to keep it in place.
- Fill the dish with water, making sure it doesn’t touch the bottom of the feeder.
- Hang the feeder above the dish, with the string or fishing line supporting both the feeder and the dish.
With the ant moat in place, you can enjoy watching hummingbirds feed without worrying about ants spoiling the nectar.
How do you make a cheap hummingbird feeder?
If you want to make a cheap hummingbird feeder, you can consider using recycled materials from around your house.
One easy way to make an affordable feeder is to repurpose an old plastic bottle.
Follow the below steps to make a cheap hummingbird feeder:
- Clean the bottle thoroughly and remove any labels or stickers.
- Cut two holes near the top of the bottle, one on each side.
- Use a needle to create a small hole at the bottom of the bottle for the nectar to flow out.
- Create a hook or loop using wire or string and attach it to the bottle.
- Fill it with sugar water and hang the feeder from a hook or tree.
If you want to prevent ants from crawling into your feeder and spoiling the nectar, you can make an ant moat using a bottle cap filled with water.
Simply attach the cap to the top of the feeder with wire or string. The ants will be unable to cross the water and reach the nectar.
How to make a cheap bird bath?
Hummingbird feeders are a great way to attract these beautiful birds to your garden. However, ants can be a nuisance and even harmful to hummingbirds.
One way to prevent ants from crawling into the feeder is by creating an ant moat. You can easily make a cheap bird bath with items that you may already have at home.
Here’s how:
- Find a shallow dish or container that is wider than your hummingbird feeder.
- Fill the dish with water.
- Place the hummingbird feeder in the center of the dish, making sure that the water level is below the feeder’s ports.
- Ants will be deterred by the water and won’t be able to crawl onto the feeder.
Not only does this method keep ants away, but it also provides a water source for birds to bathe and drink from.
Overall, creating an ant moat is an easy and budget-friendly solution to protect your hummingbird feeder.
FAQ of DIY Ant Moat Hummingbird Feeders
What materials are needed to construct a DIY ant moat for a hummingbird feeder?
How do I attach the DIY ant moat to the hummingbird feeder?
What type of plastic should I use to construct the DIY ant moat?
What size should the DIY ant moat be?
Conclusion
In conclusion, building a DIY ant moat for your hummingbird feeder is a simple and effective way to keep pesky ants away from the nectar and ensure your feathered friends can enjoy their meal in peace.
With just a few basic materials and a step-by-step guide, you can create your own ant moat and reap the benefits of a cleaner, more enjoyable bird feeding experience.
Remember to maintain the moat and keep it filled with water to ensure its continued effectiveness.

