How to Draw a Hummingbird With a Flower: Basic Steps!
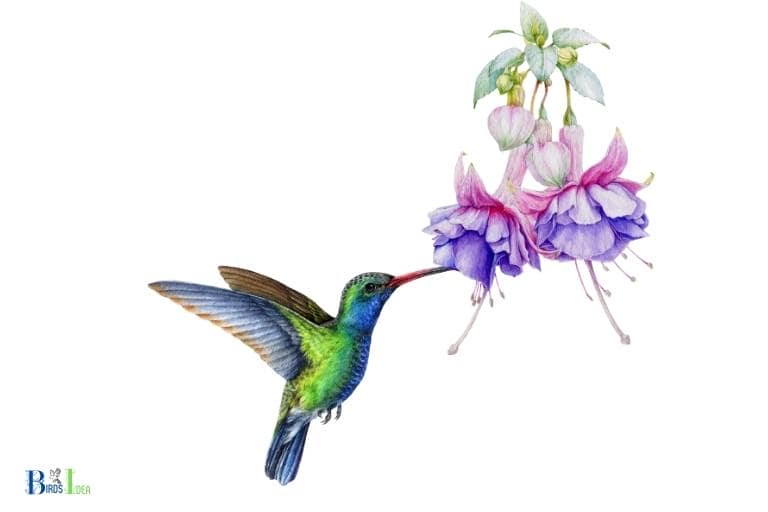
To draw a hummingbird with a flower, follow the basic steps of sketching the hummingbird’s shape, adding details to its body, drawing the flower, and coloring the final artwork.
Drawing a hummingbird with a flower involves breaking down the image into simpler shapes and lines, refining the details, and then adding color.
Begin by lightly sketching the overall shapes and forms before moving on to adding details and refining the artwork.
This will help to ensure your final drawing has accurate proportions and a natural, pleasing composition.
Finally, bring your artwork to life by adding color using your preferred art medium, such as colored pencils, markers, or watercolors.
With practice and patience, your hummingbird and flower drawing will look more realistic and visually appealing.
10 Steps to Draw a Hummingbird with a Flower
| Step | Instructions | Additional Tips |
| 1 | Sketch the hummingbird’s body | Start with an oval shape for the body and a small circle for the head, connected by a curved line for the neck |
| 2 | Add the beak | Draw a long, thin, slightly curved line extending from the head to represent the hummingbird’s beak |
| 3 | Draw the wings | Sketch two elongated, rounded shapes originating from the body, with the top wing slightly larger than the bottom wing |
| 4 | Add the tail feathers | Draw several thin, pointed shapes extending from the rear of the body to represent the tail feathers |
| 5 | Sketch the feet | Add two small, thin lines with tiny “V” shapes at the end for the feet, coming out from the bottom of the body |
| 6 | Detail the wings and body | Add feather patterns to the wings, and eye with a small circle, then fill the body with curved lines to represent the bird’s iridescent feathers |
| 7 | Draw the flower | Sketch a flower shape near the end of the beak, creating petals, a center, and a stem with leaves |
| 8 | Add depth to the flower | Add some curved lines inside the petals and leaves to create depth and texture |
| 9 | Outline your sketch | With a pen or darker pencil, outline the finalized sketch of the hummingbird and flower |
| 10 | Color the drawing | Use colored pencils or markers to add vibrant colors to your hummingbird and flower drawing |
Key Takeaway
Five Facts About: Hummingbirds and Flowers
Understanding Hummingbirds And Flowers
Understanding Hummingbird Anatomy
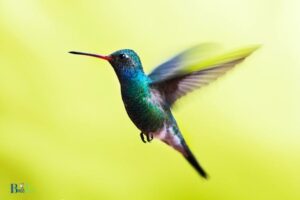
Hummingbirds are among the smallest birds in the world, known for their unique behaviors, such as hovering in mid-air and flying in various directions, including backward.
Understanding the anatomy of a hummingbird before drawing is crucial to create a realistic portrayal.
Here are the key points to note:
- Hummingbirds are tiny birds that measure around 3-5 inches long and weigh only 2-6 grams.
- They have slender, needle-like bills that are longer than their heads.
- A hummingbird’s wings are comparatively larger than their body size to sustain their rapid flight movements.
- Hummingbirds have specialized feathers that produce iridescent colors that shimmer in the sunlight.
- They have tiny feet and legs that are usually used for perching rather than walking.
Understanding Flower Anatomy
Drawing hummingbirds with flowers is incomplete without understanding the structure of the flower itself.
Here are the key points to note:
- Flowers are the reproductive structures of plants that produce seeds.
- The flower’s structural anatomy usually consists of petals, sepals, and a central reproductive organ called the pistil.
- Different flowers have unique characteristics, such as the number of petals, their size, and color, which make them identifiable.
- The nectar-producing structures of the flower attract hummingbirds and other pollinators to complete the process of pollination.
Why Drawing Hummingbirds With Flowers Is Important
Drawing hummingbirds with flowers is important because of the following reasons:
- Hummingbirds are a vital part of the ecosystem, and their role as pollinators is significant in maintaining the ecological balance.
- Capturing the beauty and unique characteristics of hummingbirds and flowers in artwork allows us to celebrate the beauty of nature and its wondrous creations.
- The process of drawing hummingbirds with flowers can be therapeutic and stress-relieving, making it an enjoyable pastime.
By understanding hummingbird and flower anatomy, you will be better equipped to create realistic artwork that captures the beauty and uniqueness of these creatures.
Materials Needed
Drawing a hummingbird with a flower requires specific materials to ensure that your artwork turns out beautifully.
Here are the materials you’ll need to complete this project:
Pencils And Erasers
To begin with, you will need a set of quality pencils and erasers:
- Hb pencil
- 2b pencil
- 4b pencil
- Kneaded eraser
- Gum eraser
Using these pencils and erasers will help you to create the perfect sketch and outline for your hummingbird artwork.
Watercolor Pencils
Next, you will need a set of watercolor pencils.
These types of pencils are perfect for making detailed illustrations of your bird and the flower it’s aiming for:
- Watercolor pencil set of 12-24 colors
- Small water brush
Using watercolor pencils provides the advantage of controlling areas where you want to mix colors and achieve a delicate effect.
Paper
To complete your artwork, it’s important to have good quality paper.
Here are the types of paper you will need:
- Watercolor paper
- Sketchbook or drawing paper
The watercolor paper will prevent water seeping through the sheet while you are using watercolor pencils and water. On the other hand, the sketchbook or drawing paper is useful for preliminary and underdrawing sketches.
Paintbrushes
The quality of paintbrushes also plays an important role while working with watercolors.
Here are the types you will need:
- Round brush #3, #5, #7 for painting feathers and a flower
- Small flat brush #4 for fine details
Using these types of paintbrushes helps you get the perfect textures and details that will bring your hummingbird to life.
Water Container
Having a water container is essential to help you control the amount of water you use while working.
Here’s what you’ll need:
- Small water container
Using a small water container will help you not overuse water when you’re working on your paper, allowing you to keep your paper dry when you need it.
Other Supplies
You will also need other items to assist you while drawing and painting:
- Fine line pens for adding details
- Table easel to support your paper while you are working
- Paper towel or cloth for drying excess water and cleaning brushes
Having these supplies close to hand will ensure that you finish your hummingbird and flower artwork quickly and efficiently.
Remember, while working on your hummingbird art, be patient and take your time. The result will be excellent with proper attention to detail and quality materials.
Steps To Draw A Hummingbird With A Flower
Hummingbirds are fascinating creatures to observe, and they are often associated with flowers. These tiny birds flittering around a flower-filled garden is a mesmerizing sight.
But what if you could draw your own hummingbird with a flower?
In this tutorial, we will walk you through step-by-step instructions on how to draw a hummingbird with a flower.
Step 1: Sketching The Basic Shape Of The Bird
To draw a hummingbird, start by sketching the basic shape using a pencil. Keep in mind the overall body structure and position of the bird, such as the head, neck, wings, and tail.
This should be done as a rough outline to give you an idea of where you are going.
Step 2: Adding Details To The Hummingbird
This is where you will add details to your hummingbird, such as the beak, eyes, feathers, and body.
Use your reference image to draw the details accurately. Pay attention to the feather texture and the bird’s stance. It’s essential to finalize the bird’s shape, adding any details without overthinking them.
Step 3: Sketching The Basic Shape Of The Flower
Before adding details to your flower, sketch its basic shape. This helps you plan the flower’s overall composition to make sure it is proportional to the bird.
Sketching makes the overall drawing easier to visualize. For the hummingbird to be in harmony with the flower, attention should be given to its shape and size.
Step 4: Adding Details To The Flower
Next, it’s time to add details to the flower. This is where you add petals, stem, and any other details visible in your reference image.
Make sure that the details you put in are correct and precise, as they can strongly affect the feel of the whole piece.
It’s essential to consider the placement of the flower around the bird accurately.
Step 5: Bringing The Bird And Flower To Life With Color
Finally, after making sure that there are no errors in the drawing, it’s time to color your hummingbird with flower. By adding color to the bird and flower details, you will give them life and vibrancy.
Using colors that complement the picture appropriately enhances the final product.
Highlight shadows, overlaps, and align the colors with the reference image to make it look like a complete artwork.
FAQ For How To Draw A Hummingbird With A Flower
What Materials Do I Need To Draw A Hummingbird With A Flower?
What Are The Basic Steps To Draw A Hummingbird Performing?
How Can I Draw The Perfect Hummingbird Wings?
What Are The Best Colors To Use For The Hummingbird And The Flower?
How Can I Make My Hummingbird Drawing More Realistic?
Conclusion
Drawing a hummingbird with a flower may seem like a daunting prospect, but with a little practice anyone can achieve a stunning result.
By following the steps outlined in this article, you can learn how to create an intricate and detailed drawing that captures the beauty of this tiny bird and its natural surroundings.
Remember to start with a light sketch and gradually build up your drawing, paying close attention to the proportions and details of the hummingbird and flower. Whether you are a beginner or an experienced artist, this drawing project is a great way to challenge yourself and improve your skills.
With practice and patience, you can create a beautiful piece of artwork that showcases the unique and delicate beauty of the hummingbird and its habitat.

