How to Draw a Simple Hummingbird? Add Wings!
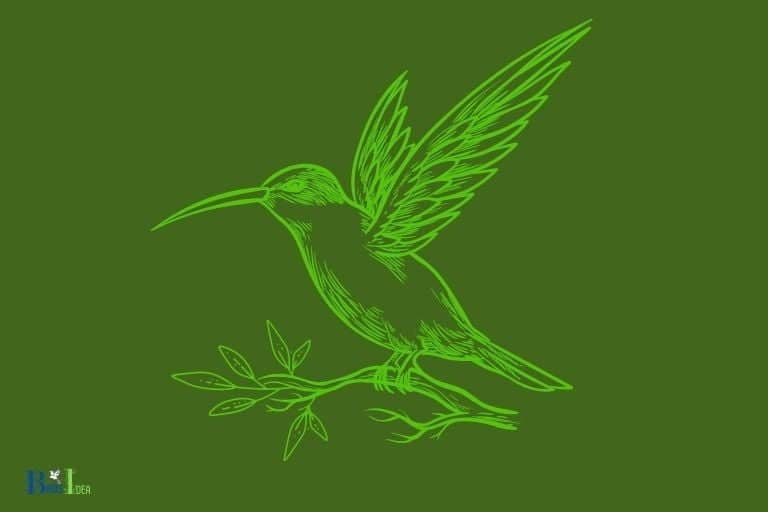
To draw a simple hummingbird, follow these steps: sketch the body shape, add wings, draw the tail feathers, and complete with the beak and details.
Drawing a simple hummingbird is a fun, creative activity that can be done by anyone, regardless of artistic skill level. By breaking down the process into easy-to-follow steps, you can create a beautiful hummingbird illustration in no time.
Supporting Paragraph
When drawing a simple hummingbird, begin with a small, oval-shaped body. Next, sketch the wings on either side, using curved lines to indicate motion.
Add the tail feathers at the base of the body, using angular lines to create a fan-like shape. Finally, draw the long, thin beak extending from the head and add any additional details such as eyes, feather markings, and shading to bring your hummingbird to life.
Practice and experimentation will help you achieve a more natural and realistic appearance.
Step-by-Step Guide to Drawing a Simple Hummingbird
| Step | Instructions | Tips |
|---|---|---|
| 1 | Draw the head | Start with a small circle for the hummingbird’s head. |
| 2 | Sketch the beak | Draw a thin, elongated triangle extending from the head for the beak. |
| 3 | Create the body | Draw an oval shape connected to the head, slightly larger for the body. |
| 4 | Add the wings | Sketch two curved lines extending from the body. Then, draw feather-like shapes on the lines to create the wings. |
| 5 | Draw the tail | Add two V-shaped lines extending from the bottom of the body, and add feather-like shapes to create the tail. |
| 6 | Include the eye | Draw a small circle near the top of the head with a small dot inside, representing the eye. |
| 7 | Add details | Include feather details on the wings and tail by adding smaller lines within the shapes. |
| 8 | Finalize the sketch | Go over your drawing with a pen or darker pencil, and then erase any unnecessary lines. |
| 9 | Color your hummingbird | Use shades of green, blue, and red for a realistic look, or choose any colors you like for a more stylized version. |
Key Takeaway

Five Interesting Facts about Hummingbirds
Materials For Drawing A Simple Hummingbird
Drawing a hummingbird is an enjoyable activity that can help you unleash your creativity. To make this experience exceptional, you will require some quality drawing materials.
This post will guide you on the best items to use for the creation of a simple hummingbird drawing.
List Of Materials Needed For Drawing A Hummingbird:
- Pencil: A reliable pencil is essential for outlining and shading your hummingbird. It is advisable to use a hard lead pencil with hb or 2h for the sketching process.
- Eraser: A good eraser will help you remove sketch marks and provide an excellent surface for the final product. A kneaded eraser is the best option for a hummingbird drawing, providing easy control over the removal of lines.
- Drawing paper: To achieve quality results, you will need high-quality drawing paper with a smooth texture. The recommended paper is the white bond paper as it works well with pencils, markers, and pens.
- Colored pencils: If you want to add color to your hummingbird drawing, colored pencils are a fantastic option. You can use them to blend and shade the feathers of your hummingbird.
- Fine-tipped markers: These are handy for outlining your hummingbird and creating intricate details.
- Paintbrush: For shading and adding color to your hummingbird drawing, a paintbrush is an excellent addition to your materials.
Description Of Quality And Functionality Of Each Material:
- Pencil: A good pencil provides smooth and consistent lines with an easy pressure applied while drawing. It also allows the artist to lighten or darken lines easily for the desired result.
- Eraser: A kneaded eraser is recommended as it is pliable and can be shaped into the desired form for the precise erasing of lines without damaging the paper surface.
- Drawing paper: High-quality paper is essential for a smooth and accurate drawing experience. The paper’s texture plays a big role in the pencil blending process and helps in the creation of a realistic drawing.
- Colored pencils: Quality colored pencils should have vibrant pigments with a smooth finish for easy application. They are easy to blend and provide a wide range of colors to choose from.
- Fine-tipped markers: These provide clean and crisp lines with consistent thickness and are suitable for outlining and creating intricate details such as the bird’s wings and feathers.
- Paintbrush: A good paintbrush should have soft bristles that can maintain their shape while in use. It should also be able to hold a good amount of water or paint to allow for easy blending and shading.
Tips On Where To Purchase The Needed Materials:
When it comes to purchasing the right materials for your hummingbird drawing, there are a few tips you can follow.
You can find most of the materials in your local art supplies store or online. However, it is advisable to purchase from renowned retailers to ensure the quality of the materials.
Here are some useful tips:
- Check out popular online stores such as amazon or ebay as they have a wide range of quality art supplies to choose from.
- Ensure you read reviews from previous customers to help in making informed decisions regarding the quality of the products.
- Check for sales and discounts from reputable retailers as this will help you save money.
- Ask for recommendations from friends and family who have experience with hummingbird drawing.
With these materials, you are ready to create an exceptional hummingbird drawing that will be both beautiful and fun to create.
Just remember to have fun and be creative, and soon, you will end up with an amazing drawing that you can be proud of.
Sketching The Hummingbird’S Basic Form
Demonstration Of How To Sketch The Hummingbird’S Basic Form
To begin, grab a pencil and a piece of paper and follow these steps to sketch the basic form of a hummingbird:
- Draw a small circle for the head.
- Add a long curved line for the body.
- Draw a smaller curved line for the tail.
- Add two small circles for the feet.
- Last but not least, add two lines for the wings.
Once you have the basic form, you can start to add more details to make the hummingbird appear more realistic.
Tips On How To Get The Proportions Right
Getting the proportions of the hummingbird right is crucial to make it look realistic.
Here are some helpful tips:
- Observe hummingbird photos or videos for reference.
- Use basic shapes to map out the body and adjust accordingly.
- Pay attention to the size and position of the head in relation to the body.
- Keep in mind the size and shape of the wings and tail compared to the body.
Explanation Of The Shapes And Forms In The Sketch
Understanding the shapes and forms in the hummingbird sketch is essential to create a realistic drawing.
Here are some explanations:
- The circle for the head and small circles for the feet give a simple indication of roundness and curves.
- The long curved line for the body creates the hummingbird’s typical s-shape.
- The small curved line for the tail indicates the tail feathers’ downward curve.
- The two lines for the wings represent the primary and secondary feathers.
Using these simple shapes will guide you to draw a realistic hummingbird with correct proportions.
Adding Details To The Hummingbird Drawing
Step-By-Step Tutorial On How To Add Details To The Hummingbird Drawing:
To bring your simple hummingbird drawing to life, you need to add a few details. These details will make your drawing look realistic and give it character.
Here is a step-by-step guide on how to add details to your hummingbird drawing:
- Draw the beak
- Make sure the beak is thin and long
- Draw the beak at an angle to give the hummingbird a more realistic look.
- Add feathers
- Draw feathers on the wings and the body
- The feathers should be small and pointy
- Try to make the feathers look like they are ruffled.
- Include the tail
- The tail should be long and thin
- Draw the tail feathers in a fan-like shape
- Make sure the feathers are long and pointed.
- Draw the eyes
- The eyes should be small and round
- Try to give the eyes a lively expression
- Add a glint to the eyes to make them look like they are sparkling.
Tips On Feather Placement, Shading, And Color Application:
Now that you have added details to your hummingbird drawing, it’s time to focus on feather placement, shading, and color application.
Here are some tips on how to make your hummingbird drawing look more realistic:
- Feather placement:
- Feathers should overlap each other
- Make feathers on the wings appear ruffled
- Angle the feathers on the tail slightly upward.
- Shading:
- Shade the underside of the hummingbird’s body to make it look more three-dimensional
- Add shading under the wing to give the hummingbird a more realistic appearance.
- Color application:
- Use bright and vibrant colors
- Make sure the colors are complementary
- Use darker colors for the shading.
Explanation Of How The Details Added Will Make The Hummingbird Drawing Come Alive:
By following the step-by-step tutorial on adding details to the hummingbird drawing and applying the right feather placement techniques, shading, and color, your hummingbird drawing will come alive.
The details added will give your hummingbird character, make it appear more realistic, and make it stand out.
The placement of feathers, shading, and color application contributes to the hummingbird’s 3d effect, and when correctly done, the hummingbird will look like it’s flying towards you out of the drawing.
Finishing Touches To Complete The Hummingbird Drawing
Explanation Of The Importance Of Finishing Touches To Complete The Hummingbird Drawing
Drawing a hummingbird can be a satisfying experience, but the final touches are what make it come to life. These details turn a basic sketch into a realistic and impressive work of art.
Here are some reasons why finishing touches are essential to completing your hummingbird drawing:
- Fine-tuning details like shadows, highlights, and textures create depth and dimensionality.
- Adding intricate features like feathers, beaks, and eyes make the bird appear more true-to-life.
- Incorporating small details like veins in the wing or tail feathers add complexity, making the bird seem more dynamic.
Demonstration Of How To Add The Finishing Touches
Now that you understand why final touches are crucial let’s explore how to do them.
Here are some tips on what to focus on:
- Create depth by using shading to add highlights and shadows to the hummingbird’s body. This gives it a three-dimensional feel and makes it pop.
- Add in more intricate details like feathers, beaks, and eyes. Take your time and work slowly, being precise with each stroke. This gives the hummingbird a more realistic appearance.
- Use your eraser to carefully remove any unwanted pencil marks. This is ideal for tidying up any rough edges and cleaning up the lines.
- Use a white pencil to mix with your shaded areas to create a highlight effect. This is perfect for adding a reflective element to the hummingbird’s feathers, beak, or eyes.
Remember, practice makes perfect, and it’s normal for the finishing touches to take time to perfect.
Tips On How To Properly Do Final Adjustments To The Hummingbird Drawing
To ensure that your hummingbird drawing is complete, follow these tips to make sure to finalize your drawing:
- Look at your finished drawing from a distance to get a complete view of it. This will highlight areas that need extra work.
- Take a break before finalizing your work. Returning to your image after a break will help you see it in a new way. You can then spot mistakes that you may have overlooked previously.
- Compare your drawing to a reference image of a hummingbird. This will help you make adjustments to any areas that do not look realistic or natural.
- Finally, step back and admire your completed masterpiece. You have succeeded in creating an astounding hummingbird drawing!
FAQ About How To Draw A Simple Hummingbird
How Can I Draw A Hummingbird Easily?
How Many Colors Should I Use For A Hummingbird Drawing?
What Type Of Paper Should I Use To Draw A Hummingbird?
Can I Draw A Hummingbird Without Any Reference?
How Can I Improve My Hummingbird Drawing Skills?
Conclusion
Drawing a hummingbird can be a fun and entertaining activity for those who love art. With the right tools, techniques, and practice, you can easily master the art of sketching hummingbirds in no time.
Remember to begin with simple shapes and basic proportions, eventually adding details and shading to bring your hummingbird drawing to life.
Whether you’re a newbie or an expert artist, drawing hummingbirds can be a gratifying experience that will allow you to unlock your creativity and enhance your artistic skills.
So, grab a paper, a pencil, and start drawing a simple hummingbird today.
Who knows, you might eventually create your own unique and artistic hummingbird masterpiece! Always keep practicing and never give up, for the world needs more talented and creative artists like you. Happy drawing!


