How to Make a Paper Mache Hummingbird: A Guide
To make a paper mache hummingbird, you will need to create a basic structure, layer it with paper mache strips, and paint it to give it a realistic appearance.
Paper mache is a versatile crafting technique that involves layering strips of paper or other materials with a paste to create a sturdy, textured surface.
This technique can be used to create a wide variety of objects, including sculptures of animals such as hummingbirds.
To create a basic hummingbird structure, bend a piece of wire into the shape of the bird’s body, with a long beak and tail. Use masking tape to wrap around the wire, adding volume to the body, and to secure smaller pieces of wire for the wings and feet.
Once the basic structure is created, dip the newspaper strips into the paper mache paste and layer them onto the structure, ensuring that each strip overlaps the previous one for added strength.
Allow the paper mache to dry completely before painting your hummingbird with acrylic paint, using a range of colors to create a realistic appearance.
7 Step-by-Step Process of Making a Paper Mache Hummingbird
| Step | Materials | Instructions |
| 1 | Newspaper, water, flour, bowl | Tear the newspaper into small strips. In a bowl, mix equal parts water and flour to create the paper mache paste. |
| 2 | Balloon, tape, cardboard, scissors | Inflate a balloon to the desired size of the hummingbird’s body. Cut out a tail and beak from the cardboard, and tape them to the balloon. |
| 3 | Newspaper strips, paper mache paste, balloon | Dip the newspaper strips into the paper mache paste, making sure they are fully coated. Apply the strips to the balloon, covering the entire surface and overlapping the strips. Add three to four layers, while keeping the tail and beak exposed. |
| 4 | Drying | Allow the paper mache hummingbird to dry completely, preferably overnight or for at least 12 hours. The structure should be hard and dry before proceeding. |
| 5 | Acrylic paint, paintbrushes | Paint the dried paper mache hummingbird with acrylic paint, using a variety of colors and patterns to resemble a real hummingbird. Allow the paint to dry. |
| 6 | Clear varnish, paintbrush | Apply a clear varnish to the painted hummingbird to seal and protect the surface. Allow the varnish to dry. |
| 7 | Fishing line, needle, scissors | Thread a piece of fishing line through a needle and carefully pierce the top of the hummingbird, creating a small hole. Tie a knot in the fishing line to create a hanging loop. Trim the excess fishing line, if needed. |
Key Takeaway
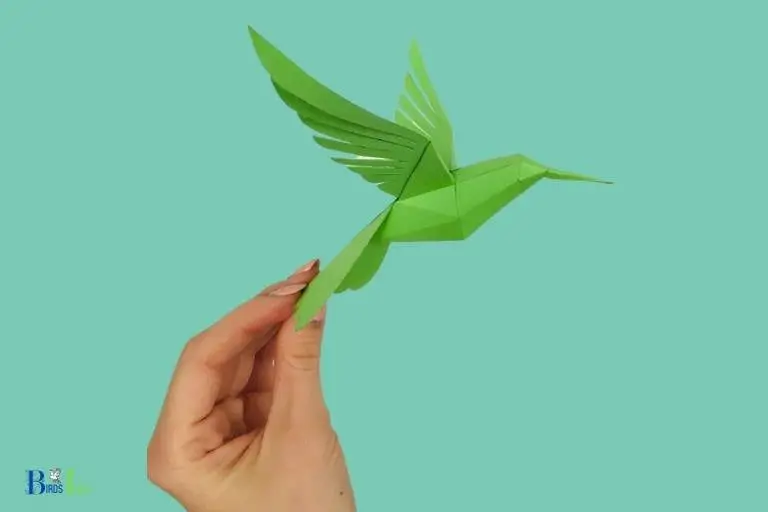
Five Facts About: Paper Mache Hummingbirds
Materials
Making a paper mache hummingbird can be a fun and creative project for both kids and adults alike. Once completed, it can serve as a charming and unique decoration for your home. However, before diving into the actual process of paper mache-ing, it’s important to gather the necessary materials.
In this section, we’ll provide you with a comprehensive list of all the materials you’ll need, as well as tips on where to purchase them.
List Of All The Materials Needed To Make A Paper Mache Hummingbird:
- Flour
- Water
- White paper (newspaper or printer paper)
- Scissors
- Balloons
- Paintbrushes
- Acrylic paint
- Glue
- Aluminum foil
- Cardboard
Tips On Where To Purchase Materials:
- Flour and water can be found at your local grocery store.
- White paper can be sourced from your home or office. If you require more paper, standard printer paper or recycled newspaper works well.
- Scissors, balloons, and paintbrushes can be found at most arts and crafts stores or online.
- Acrylic paint can be purchased at your local art-supply store or online. To keep costs down, acrylic paint value packs are a good option.
- Glue can be bought at most stationary or arts and craft stores.
- Aluminum foil is readily available at your local grocery store.
- Cardboard can be sourced from your home or can be found at most craft stores.
Now that you have a list of everything you’ll need and where to purchase it, you’re ready to start constructing your paper mache hummingbird!
Step-By-Step Instructions On Making A Paper Mache Hummingbird
Are you looking for a fun and creative way to spend an afternoon? Why not make a paper mache hummingbird?
This step-by-step guide will walk you through the process of creating a beautiful bird sculpture that you can enjoy for years to come.
Materials
Here are the supplies you will need:
- Balloon (or other round object)
- Flour
- Water
- Newspaper
- Scissors
- Paint (in your choice of colors)
- Paintbrushes
- Glue
- Wire
- Pliers
Detailed Instructions On Each Step Of The Process
- Inflate your balloon to the desired size for your hummingbird’s body. Cut newspapers into strips about 1-inch wide.
- Mix flour and water in a bowl to create a paste. The consistency should be thick, like pancake batter.
- Dip a strip of newspaper into the bowl of paste, making sure it’s fully covered. Gently remove excess paste with your fingers and apply the strip to the surface of the balloon. Cover the entire surface, leaving a small opening for the base of your hummingbird’s beak.
- Let the first layer of paper mache dry overnight or until the surface is hard to the touch.
- Repeat steps 3-4 for at least two more layers of paper mache. You can add more layers to make your hummingbird more durable.
- Use scissors to cut a beak shape out of wire. Use pliers to bend the wire into the desired shape, leaving a small portion at the end to attach it to the body.
- Glue the beak wire into the opening you left in the body.
- Use more wire to create a loop for the hummingbird’s feet. Attach the feet to the bottom of the body with glue.
- Paint your hummingbird in your desired colors. Allow the paint to dry completely.
- Your paper mache hummingbird is now complete and ready to display!
Mention Of Important Techniques To Keep In Mind
- Make sure your paper mache is fully dry between layers to avoid cracking or warping.
- Be patient! The process of creating a paper mache hummingbird can take several days.
- Experiment with different paint colors and designs to make your hummingbird unique.
Now that you have the tools and knowledge for creating a stunning paper mache hummingbird, it’s time to let your creativity soar! Remember to take your time and have fun with it. Happy crafting!
Painting And Decorating Your Paper Mache Hummingbird
Tips For Painting And Adding Details
After you have completed the paper mache hummingbird, it’s time to add some color and character to your creation.
Here are some tips for painting and adding details to your paper mache hummingbird:
- Use acrylic paints for a vibrant and long-lasting finish.
- Start with a base coat of white paint to create a neutral canvas for your colors and details.
- Choose bold, contrasting colors to make your hummingbird stand out.
- Use a small brush to add fine details, such as the beak, eyes, and feathers.
- For a more realistic look, use shades of brown and gray to create a textured effect on the feathers.
- Don’t be afraid to get creative with the design. Add a unique design or pattern to your hummingbird.
- Finish with a clear coat of varnish to protect the paint and add a glossy finish.
Different Approaches To Decorate A Hummingbird
Now that you have your paper mache hummingbird painted and detailed, it’s time to add some extra decoration.
Here are some different approaches to decorate your hummingbird:
- Use glitter glue to add a touch of sparkle to your hummingbird’s feathers.
- Experiment with different types of paper to add texture and dimension to your hummingbird.
- Add small beads or sequins to the feathers or wings for a touch of glam.
- Use a thin piece of wire to create a whimsical, curving tail.
- Create a miniature flower or plant to perch your hummingbird on.
- Use a hot glue gun to attach small decorative items, such as a ribbon or small flowers, to your hummingbird.
Remember, the possibilities are endless when it comes to decorating your paper mache hummingbird. Get creative and have fun!
Displaying Your Paper Mache Hummingbird
Creative Ways To Display A Paper Mache Hummingbird
Once you have made your beautiful paper mache hummingbird, you may be wondering how best to display it. There are so many creative ways to show off your unique creation.
- Hang it on the wall with a clear, almost invisible thread so it looks like it’s flying.
- Create a nature-themed centerpiece by placing it in a nest with a few twigs, leaves, and flowers.
- Place it on a bookshelf, next to your favorite book.
- Create an eclectic display with a collection of small treasures like antique keys, marbles, and crystals.
Tips On Preserving Your Hummingbird For Long-Term Display
You put so much effort into creating your paper mache hummingbird; you want it to last as long as possible.
Here are some tips to ensure long-term display:
- Avoid direct sunlight as it can cause fading and deterioration.
- Display it behind glass, so it doesn’t get dusty.
- Apply a clear coat of sealant to protect it from moisture.
- Avoid displaying your hummingbird in humid or damp areas.
Your paper mache hummingbird is a unique piece of art, and by displaying it creatively and taking care of it, it will remain a beautiful addition to your home decor for years to come.
FAQ On How To Make A Paper Mache Hummingbird
What Is Paper Mache?
What Materials Do I Need To Make A Paper Mache Hummingbird?
How Do I Make The Paper Mache Paste?
How Many Layers Of Paper Mache Do I Need To Create A Hummingbird?
How Long Does It Take To Make A Paper Mache Hummingbird?
Conclusion
Now that you know how to make a stunning paper mache hummingbird, it’s time to get crafting! Remember to take your time and follow each step carefully to create a beautiful end result.
Whether you plan to use your hummingbird as a decoration or as part of a larger project, you can be proud of your creative skills.
Try experimenting with different colors or adding additional layers for a more intricate design. Don’t forget to share your finished product with friends and family – they are sure to be impressed by your artistry.
With some dedication and patience, you can create a stunning paper mache hummingbird that is sure to be a hit!

