How to Photograph Hummingbirds With a Flash: Simple Steps!
To photograph hummingbirds with a flash, you need to use a high-speed flash, set your camera to manual mode, and choose the right camera settings, such as fast shutter speed, low ISO, and a small aperture.
Capturing high-quality images of hummingbirds with a flash requires a combination of proper equipment and technique.
Using a flash helps freeze the movement of these fast-moving birds and brings out the vibrant colors in their feathers.
By following the right steps and adjusting your camera settings, you can achieve stunning photographs of hummingbirds in action.
When photographing hummingbirds with a flash, it’s essential to have the right equipment, such as a high-speed flash to freeze their rapid movements.
Setting your camera to manual mode gives you full control over the exposure settings, allowing you to choose a fast shutter speed to capture the bird in motion.
Opt for a low ISO setting to reduce noise and a small aperture to ensure the image is sharp and well-exposed.
By following these tips, you’ll be able to capture stunning and vibrant images of hummingbirds in action.
10 Steps to Photograph Hummingbirds with a Flash
| Step | Description |
| 1 | Choose the right gear: High-speed camera with a fast lens and external flash with high-speed sync capability |
| 2 | Set up your camera: Use manual mode, set a fast shutter speed (1/1000s to 1/8000s), and an aperture between f/5.6 and f/8 |
| 3 | Position the flash: Place the flash off-camera at a 45-degree angle to your subject, and set the flash power between 1/8 and 1/4 depending on distance |
| 4 | Use a tripod: Mount your camera on a tripod to ensure stability and reduce camera shake |
| 5 | Pre-focus: Pre-focus on the area where the hummingbirds are likely to be, using manual focus or back-button focusing |
| 6 | Observe hummingbird behavior: Watch for patterns in their movements and feeding locations to anticipate their next visit |
| 7 | Trigger the flash: Use high-speed sync mode to freeze the hummingbird’s motion, and ensure the flash duration is short enough to avoid motion blur |
| 8 | Take multiple shots: Take several shots in quick succession to increase the chances of capturing a sharp image |
| 9 | Check your results: Review your images on the camera’s LCD screen and adjust settings as needed for better results |
| 10 | Post-processing: Enhance your images using photo editing software to adjust exposure, colors, and sharpness as needed |
Key Takeaway
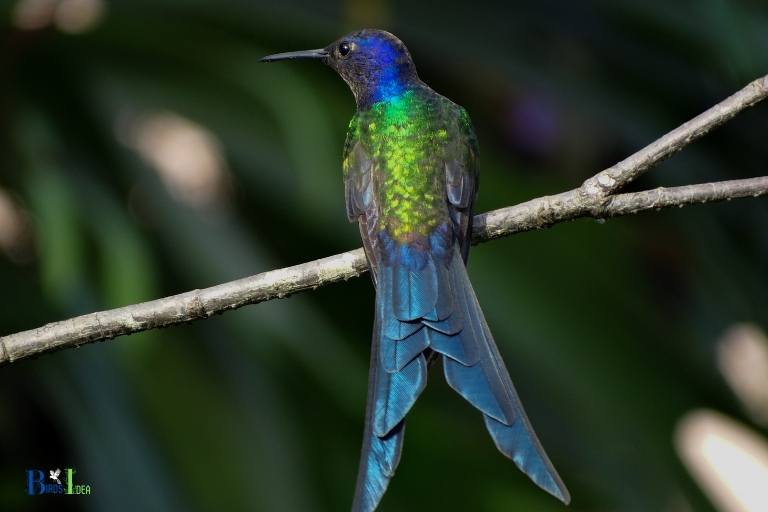
Five Facts About: Photographing Hummingbirds with a Flash
Why Photographing Hummingbirds With A Flash Is A Challenge
Hummingbirds are enchanting creatures that are fun to observe and photograph. However, capturing these speedy birds with a flash can be quite challenging.
We will discuss why photographing hummingbirds with a flash is a challenge and provide insights on overcoming these challenges.
Hummingbird Behaviour
Hummingbirds are small, fast, and erratic creatures that make it difficult for photographers to capture them with a flash.
Some of the notable behaviours that make them challenging to photograph include:
- Quick and unpredictable movements
- Fast wing flapping that can cause motion blur
- Wariness of humans and anything they perceive as a threat
- Limited timeframes for photography due to specific periods for feeding and resting
To successfully photograph hummingbirds with a flash, you must understand their behaviour, so you know when and how to take the perfect shot.
Lighting Conditions
Lighting is a crucial aspect of photography, and with hummingbirds, it can be tricky because you have to deal with fast movements and changing light conditions.
Since hummingbirds move too fast, they don’t stay in one location for long, so photographing them in natural light can be challenging.
The use of a flash helps freeze the motion and illuminate the hummingbird’s feathers, making it easier to see details.
Here are some things to consider when using a flash to photograph hummingbirds:
- Be careful not to use too high a flash power, as it can cause overexposure or flash blindness.
- Try to use the flashes off-camera, so you have more control of the light’s direction
- Experiment with the flash’s settings to find the right balance between light and shadow.
Desired Outcome
When taking pictures of hummingbirds with a flash, your primary focus should be to capture their beauty, speed, and movement. You also want your photographs to be sharp, with vibrant colours, and free of motion blur.
Here are some tips to help you achieve your desired outcome:
- Use a high shutter speed to freeze the motion of the hummingbirds
- Opt for a low aperture to create a shallow depth of field
- Position yourself in a shaded area to ensure the background is not overexposed.
Photographing hummingbirds with a flash may not be easy, but with the right techniques and equipment, anyone can do it.
By understanding hummingbird behaviour, lighting conditions, and your desired outcome, you can capture stunning photographs that showcase their beauty and unique movements.
Getting The Right Equipment
Camera
When it comes to photographing hummingbirds with a flash, having the right camera is crucial for capturing the perfect shot.
Here are some key points to consider when selecting a camera:
- Choose a camera with good autofocus and continuous burst mode to capture the quick movements of hummingbirds.
- A camera with a high frame rate will also ensure that you don’t miss any shots.
- Look for a camera with manual controls to allow for customization of settings to get the perfect shot.
- A camera with a fast shutter speed will help you freeze the motion of the hummingbirds wings, allowing you to see the intricate details.
Flash
Using a flash is essential when photographing hummingbirds, as it provides additional light to capture them in flight.
Here are some points to keep in mind when selecting a flash:
- Choose a flash with high speed synchronization (hss) to enable you to use a fast shutter speed and still get the additional light you need.
- Look for a flash that can be rotated and tilted for greater flexibility in directing your light source.
- You’ll want a flash with good battery life so that you don’t miss any shots.
- A flash with adjustable power settings will allow you to control the amount of light you use.
Lenses
Having the right lens is essential for capturing the details of hummingbirds in flight.
Here are some things to keep in mind when selecting a lens:
- Look for a lens with a high magnification and zoom capabilities, such as a telephoto lens, to allow you to capture images from a distance.
- A lens with a wide aperture will enable you to have a shallow depth of field, creating a blurred background that makes the hummingbirds stand out.
- A lens with image stabilization is vital to reduce camera shake and ensure sharp images.
- A fast autofocus lens will ensure that you don’t miss any shots and can adjust focus quickly as the hummingbirds move.
Remember that getting the right equipment is important for taking high-quality photographs of hummingbirds. By selecting the right camera, flash, and lens, you’ll have all the tools you need to capture stunning images of these beautiful birds.
Selecting The Location
Capturing stunning hummingbird photographs with a flash can be exciting. However, selecting the right location is critical since these swift birds are continually flying and moving.
Here are some key considerations you should keep in mind when picking a location for your next hummingbird photography session:
Lighting Considerations
Lighting plays an essential role in your hummingbird photography. It can help you to create stunning images that showcase the beauty of these tiny birds.
Here are some lighting considerations to keep in mind:
- Choose soft natural light conditions like early morning or late afternoon.
- If you have to shoot in bright sunlight, then take advantage of the flash’s high-speed sync to keep the shadows soft and low.
- Additionally, consider using flash diffusers, such as softboxes, to get a soft light.
Choosing The Right Background
The background is a crucial part of your hummingbird photos, and it can make or break the final image.
Here’s what to keep in mind when choosing the right background:
- A natural background, such as trees or flowers, can make your photos look authentic and realistic.
- Avoid busy backgrounds that can distract the viewers’ attention from the hummingbirds.
- Black or dark backgrounds also work well to isolate the hummer from the surroundings, especially if you want to capture their iridescence.
By keeping these key points in mind when selecting your location, you will have a better chance of capturing the perfect hummingbird photograph with a flash. So get out there and start exploring!
Setting Up And Preparing Your Gear
If you want to capture stunning photos of hummingbirds with a flash, you need to have the right gear and know how to use it effectively.
Here’s what you need to do to set up your equipment for optimal results:
Adjusting Your Flash
To capture high-quality hummingbird photographs with a flash, you’ll need to adjust the settings on your flash head.
Follow these steps to do so:
- Set your flash to manual mode: It’ll give you full control over the intensity and duration of your flash.
- Adjust the flash power: Start with a low power setting, and gradually increase the intensity until you achieve the desired effect. A 1/64 or 1/128th power setting would be best.
- Choose the flash duration: Using a fast flash duration will freeze the hummingbird’s wings and make the image look sharp.
- Angle your flash head: Point the flash towards the background instead of facing the hummingbird directly.
Setting Up Your Background
Now that your flash is appropriately adjusted, it’s time to move on to the background preparation.
Here’s how you can set up the perfect backdrop for your hummingbird photos:
- Choose the right background color: Select a clean and non-distracting background color to make the hummingbird stand out. A white or black background would be ideal.
- Hang a cloth: Stretch out a piece of solid-colored fabric like a bedsheet or a backdrop, and hang it behind the hummingbird’s favourite perch spot.
- Use a feeder: Hummingbirds are attracted to feeders. Placing it at the right spot can attract them, and you get the shot you want.
Camera Settings
Now that your flash and background are set up, let’s move onto your camera settings.
Follow these guidelines to capture the perfect hummingbirds with a flash:
- Set your camera to manual mode: It gives you control over the settings, which is essential for getting the perfect shot.
- Dial in your iso: Low iso settings like 100-200 are ideal, providing the best possible image quality.
- Choose a fast shutter speed: Set your camera to a high shutter speed. A minimum of 1/1000 and above will freeze the hummingbird’s movements, making your photo super sharp.
- Select your lens: Choose a lens with a higher focal length to capture as much detail as possible.
By following the steps outlined above, you can set up your gear and capture gorgeous, crystal-clear hummingbird photos with a flash. So, grab your camera, head out to your garden, and start snapping!
Finding Your Shot
Spotting Hummingbirds
Hummingbirds are usually found in gardens, forests, and parks during the warmer months.
Here are some tips on how to spot these tiny birds:
- Keep an eye out for brightly colored flowers, as that’s where hummingbirds are most likely to visit.
- Look for birds hovering or darting around the area.
- Listen for the hummingbird’s distinctive buzzing sound.
Preparing For The Shot
To capture hummingbirds with a flash, you’ll need to prepare your camera and setup.
Here are some key tips to keep in mind:
- Choose the right camera and lens. A camera with a fast shutter speed and a long telephoto lens will help you capture the action.
- Set up your camera at a distance to avoid scaring the hummingbirds away.
- Use a sturdy tripod to keep your camera steady.
- Choose the right flash, such as a ring flash, to provide even illumination.
Once you’ve spotted your hummingbird and prepared your equipment, it’s time to take the shot. Remember to stay patient and take multiple shots to ensure you capture the perfect shot.
With these tips, you’ll be on your way to stunning hummingbird photography.
Getting The Best Shot
Positioning The Camera And Flash
If you want to photograph hummingbirds with a flash, then getting the right position is crucial.
Here are some steps you can follow to make sure you get the best shot:
- Start by setting up your camera and flash in a comfortable position.
- Use a tripod to secure your camera to avoid unnecessary movement.
- Position the camera lens facing towards the hummingbirds’ flight path.
- Keep a safe distance, but close enough to capture the birds in detail.
- Always make sure the camera is level.
- Adjust the camera’s iso and aperture settings for optimal lighting.
Best Positions For Shooting Hummingbirds
Finding the right position to photograph hummingbirds can be a challenge. Here are some positions to consider that can help you capture stunning shots.
- Head-on position: This will give you an excellent view of the hummingbirds’ faces, and you’ll also be able to capture their wings’ movements.
- Side angle position: This position provides a great shot of the hummingbirds in flight. You’ll capture the details of their wings and the colors on their backs.
- Perching position: Hummingbirds can be captured while perching on flowers, branches, or feeders. This position provides an opportunity to capture finer details, such as feathers and beaks.
Remember, hummingbirds are lightning-fast creatures, so don’t get discouraged if you need to take several shots to capture the perfect one. Keep practicing and experimenting with different angles and positions.
With time, you’ll be able to take stunning hummingbird photos.
Overcoming Challenges
Photographing hummingbirds with a flash can be both challenging and rewarding. The fast motion and small size of these birds create difficulties that need to be overcome to capture clear and vivid shots.
We’ll discuss tactics to help you get the perfect shot.
Under the subheading “overcoming challenges,” we’ll cover three key areas: dealing with flight motion, managing shadows, and technical difficulties.
Dealing With Flight Motion
Photographing hummingbirds in flight can be challenging, but it’s also what makes capturing them so rewarding.
Here are some tips for capturing the perfect shot:
- Use a high shutter speed, at least 1/1000 sec, to capture the fast movement.
- Set your camera to continuous autofocus mode to keep the bird in focus as it moves.
- Use a wide aperture, such as f/2.8 or f/4, to decrease the depth of field and isolate the bird in the frame.
- Look for a good background that will highlight the bird’s vivid colors.
Managing Shadows
Shadows can easily ruin a great hummingbird shot, but there are things you can do to manage them:
- Use a flash to fill in harsh shadows and brighten the scene.
- Position yourself and your camera to avoid casting a shadow on the bird.
- Watch the angle of the sunlight and position yourself so that it highlights the bird without casting a shadow.
Technical Difficulties
Using a flash introduces its own set of technical difficulties, but there are solutions to these as well:
- Use a flash that allows for a high-speed sync to properly expose the shot.
- Choose a flash with a ttl metering system to quickly adapt to changing lighting conditions.
- Experiment with the flash’s position to get the most flattering light for your shot.
Photographing hummingbirds with a flash can be challenging, but with the right techniques, you can capture stunning images of these incredible creatures.
Making Basic Adjustments
Taking a picture of hummingbirds with a flash is not as easy as it sounds. You will have to adjust various settings to capture the perfect shot.
Here are some basic adjustments you can make to your camera settings:
Exposure Compensation
- Adjust your camera’s exposure compensation to get the best possible image.
- Exposure compensation helps you adjust the brightness of an image by changing the amount of light that enters your camera’s sensor.
- Experiment with different levels of exposure compensation until you are satisfied with your shot.
- Make sure you keep the background in mind when taking the picture. Adjusting the exposure compensation can affect the color and details of the background.
Saturation
- If you want the colors in your hummingbird photos to pop, adjust your camera’s saturation setting.
- The saturation setting affects the intensity of the colors in your image.
- Increase the saturation level until the colors of the hummingbird and its surroundings are vibrant and eye-catching.
- Be careful not to overdo it, as excess saturation can give an artificial and unrealistic look to the image.
Color Adjustment
- To enhance the colors and details of your hummingbird photos, you can adjust the color temperature.
- The correct color temperature setting can help you achieve a more natural and lifelike image.
- Look at the colors in your background and adjust the color balance accordingly.
- Paying attention to the colors and hues in your shot can make a significant difference in the final image.
By making these basic adjustments in your camera settings, you can improve your chances of capturing breathtaking hummingbird photos. Keep experimenting until you find the perfect settings for your camera and the environment you are in.
Fine Tuning Your Photos
Photographing hummingbirds is a daunting task, and getting the perfect shot requires skill, patience, and technique. In this section, we will discuss how to fine-tune your photos of hummingbirds using flash photography.
Removing Unwanted Elements
Getting rid of the unwanted background elements in your hummingbird photos is essential in creating an eye-catching image.
Here are some ways to remove unwanted elements:
- Crop your photo to focus on the hummingbird and blur the background.
- Use a cloning tool to remove any distracting elements from the photo.
- Change the angle of the camera to eliminate the unwanted elements from the frame.
Enhancing Details
Adding detail to your hummingbird photos will make them more visually appealing.
Here are some ways to enhance the details:
- Use a sharp lens and a fast shutter speed to capture movement.
- Adjust the aperture to get a shallow depth of field, which will blur the background and make the hummingbird stand out.
- Increase the contrast and saturation of the photo to bring out the colors of the hummingbird’s feathers.
By following these tips, you can take your hummingbird photography to the next level. Remember to practice, have patience, and experiment with different techniques to find what works best for you.
So, pick up your camera, and start capturing those amazing hummingbirds!
FAQ Of How To Photograph Hummingbirds With A Flash
How Do You Photograph Hummingbirds With A Flash?
What Kind Of Flash Is Best For Hummingbird Photography?
What Is The Best Lighting Setup For Hummingbird Photography?
How Can You Attract Hummingbirds To Your Backyard For Photography?
What Camera Settings Should You Use For Hummingbird Photography?
Conclusion
Capturing the beauty and grace of hummingbirds in photographs can be challenging, but with the right equipment and techniques, you can create breathtaking images. Using a flash can help you freeze the motion of these fast-moving creatures and add an extra element of clarity to your shots.
Experiment with the settings of your camera and flash system to achieve the desired effect and capture stunning images that showcase the unique features of hummingbirds.
Remember, practice and patience are key in wildlife photography. With time and experience, you’ll refine your skills and develop your own personal style.
So, keep exploring and experimenting with new techniques to take your hummingbird photography to new heights. Now, it’s time to grab your gear and start shooting!

