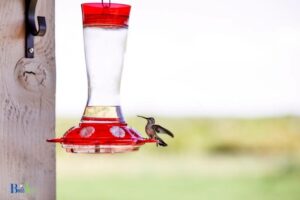
How To Take Apart A Hummingbird Feeder?
Hummingbird feeders are essential for attracting hummingbirds to your garden and providing them with essential nectar.
However, regular maintenance is crucial to keep the feeder clean and free from mold, bacteria, and pests. Taking apart a hummingbird feeder is an easy process that ensures proper cleaning and longevity of the feeder.
Finally, clean and sanitize each part separately with warm soapy water and a mild bleach solution.
Rinse thoroughly and reassemble the feeder once fully dry. Proper care and maintenance will help keep the hummingbirds happy, healthy, and coming back for more.
8 Number of Task: Take Apart A Hummingbird Feeder
| Step Number | Task | Tools Needed | Notes |
|---|---|---|---|
| 1 | Disconnect the feeder from the hanger | None | Be careful not to spill any remaining nectar |
| 2 | Unscrew the base from the feeder | None | Make sure to hold the feeder upright to prevent spills |
| 3 | Remove the feeding ports and/or flower petals | None | Some feeders have snap-on or twist-off ports |
| 4 | Remove any other attachments or decorations | None | Take note of how they were attached for reassembly |
| 5 | Empty any remaining nectar | None | Dispose of the nectar properly to avoid attracting insects |
| 6 | Clean the individual parts | Warm soapy water, soft brush/cloth | Scrub gently to remove residue and bacteria |
| 7 | Rinse thoroughly | Clean water | Ensure there is no soap residue left on the parts |
| 8 | Allow parts to air dry | None | Make sure each part is completely dry before reassembly to prevent mold growth |
Key Takeaway

Five Facts About: Take Apart A Hummingbird Feeder
What Tools Do I Need to Take Apart a Hummingbird Feeder?
Taking apart a hummingbird feeder is essential for cleaning and maintaining it, ensuring the health of the visiting hummingbirds.
To disassemble a hummingbird feeder, you’ll need a few basic tools:
- Non-abrasive sponge or cloth: For gently cleaning the feeder without scratching it.
- Warm, soapy water: To clean the feeder and remove any sugar residue.
- Small brush or pipe cleaner: For reaching tight spots and cleaning the feeding ports.
- A pair of pliers: To aid in loosening tight connections or removing stuck parts.
- Clean towel or paper towel: For drying the feeder parts after washing.
- White vinegar (optional): To remove any mold or mineral deposits.
Remember to be gentle while handling the feeder, as some parts may be delicate or made of glass.
Always thoroughly clean and dry the feeder before reassembling and refilling it with sugar water.
“Regular cleaning and maintenance of hummingbird feeders is crucial for preventing the growth of harmful bacteria and keeping hummingbirds healthy.”
birdsidea
What Are the Benefits of Taking Apart a Hummingbird Feeder?
Taking apart a hummingbird feeder offers various benefits for both the birds and the feeder owner. By disassembling the feeder, you can thoroughly clean and maintain it, ensuring it remains in the best possible condition.
A clean feeder prevents the growth of harmful mold, bacteria, and yeast that can sicken or even kill hummingbirds.
Additionally, taking apart the feeder allows for the inspection and replacement of any damaged or worn-out components, thus prolonging the feeder’s lifespan.
In summary, disassembling a hummingbird feeder contributes to healthier birds and a well-maintained feeder.
Benefits of taking apart a hummingbird feeder:
- Thorough cleaning
- Prevention of mold, bacteria, and yeast growth
- Regular inspection of feeder components
- Easy replacement of damaged or worn-out parts
- Prolonged lifespan of the feeder
- Healthier hummingbirds and a more enjoyable bird-watching experience
How to Clean a Hummingbird Feeder After Taking it Apart?
Cleaning a hummingbird feeder after taking it apart ensures the health and safety of the visiting hummingbirds. Start by dismantling the feeder into its individual components – base, reservoir, feeding ports, and any additional parts.
Soak the components in a solution of 1 part white vinegar to 4 parts warm water for at least 30 minutes, which effectively removes any mold, dirt, or residue.
After soaking, use a soft brush to gently scrub the parts, paying special attention to the feeding ports and tiny crevices.
Rinse the components thoroughly under running water and allow them to air dry. Once dry, reassemble the feeder and fill with fresh nectar.
- Dismantle the feeder
- Soak components in vinegar-water solution
- Scrub with a soft brush
- Rinse thoroughly and air dry
- Reassemble and refill with fresh nectar
What to Look for When Reassembling a Hummingbird Feeder?
When reassembling a hummingbird feeder, it’s essential to ensure all parts are securely fitted and clean to provide a safe feeding environment for the birds.
Additionally, make sure to avoid any leaks in the feeder, as they can attract unwanted pests.
- Inspect the parts: Make sure all components, such as the base, nectar container, feeding ports, and any additional parts, are free from damage or cracks.
- Properly align the components: Double-check that the parts fit together correctly and that the feeding ports align with any necessary perches or decorative accessories.
- Check for a tight seal: Verify that all seals and connections are tight, without limiting the hummingbirds’ ability to access the nectar.
- Cleanliness: Ensure all parts are thoroughly cleaned before reassembling the feeder to prevent the growth of mold or bacteria.
By paying close attention to these aspects when reassembling a hummingbird feeder, you can provide a safe and enjoyable feeding environment for your garden’s hummingbirds.
Troubleshooting Tips for Hummingbird Feeders That Won’t Reassemble
When reassembling a hummingbird feeder, a few common issues can arise.
To make the process smooth, consider the following troubleshooting tips:
- Ensure all components are clean and dry before attempting to reassemble the feeder.
- Check the manual or website of the feeder’s manufacturer for specific instructions or diagrams.
- Inspect all parts for damage or wear, as broken or warped components may be challenging to put back together.
- Align all pieces correctly, and gently twist or snap them into place without forcing them.
- If the feeder has a vacuum seal, ensure it is properly sealed by ensuring the feeder’s base and top are properly screwed together.
Consider these troubleshooting tips for hummingbird feeders that won’t reassemble:
- Review the manufacturer’s instructions or visit their website for guidance.
- Inspect and clean all parts before reassembly.
- Replace any damaged or worn components.
- Ensure all parts are correctly aligned and gently secure them in place.
- Confirm the vacuum seal is properly sealed, if applicable.
Conclusion
In conclusion, dismantling a hummingbird feeder can be done in just four easy steps with the help of some basic tools.
The benefits of taking apart a hummingbird feeder include being able to clean it thoroughly and prevent mold and bacteria buildup, ensuring the health and safety of the hummingbirds.
Remember to check for any cracks or damage when reassembling the feeder, and troubleshoot any issues that may arise.
By following these simple steps, you can easily disassemble, clean, and reassemble your hummingbird feeder to keep your feathered friends happy and healthy.
According to a study by the Hummingbird Monitoring Network, 33% of all hummingbird deaths are caused by disease and infection from dirty feeders.
birdsidea
FAQ for Take Apart A Hummingbird Feeder
What tools are needed to take apart a hummingbird feeder?
What is the process for taking apart a hummingbird feeder?
Is there a specific way to reassemble the hummingbird feeder?
Are there any safety precautions I should take?
How do you safely clean a hummingbird feeder?
Cleaning your hummingbird feeder regularly is important to ensure the health and safety of the birds that visit it.
Here’s how to safely clean a hummingbird feeder:
Disassemble the feeder: Carefully take apart the different components of your hummingbird feeder.
Wash with soap and water: Use dish soap and warm water to clean the feeder thoroughly. Pay special attention to hard-to-reach areas or any spots with visible mold or debris.
Rinse with water: Rinse the feeder with clean water to remove any soap residue.
Sanitize: Create a solution of one part white vinegar and four parts water. Soak the feeder in this solution for at least 30 minutes.
By following these steps, you’ll keep your hummingbird feeder clean and safe for these beautiful and delicate birds.
How do you open and fill a hummingbird feeder?
Opening and filling a hummingbird feeder is a simple process that requires a few basic steps.
Here’s how to do it:
- Start by cleaning the feeder with a mixture of warm water and vinegar to remove any dirt or residue from the previous feeding.
- Rinse the feeder with clean water and dry it thoroughly before adding fresh nectar.
- To make the nectar, mix one part white granulated sugar with four parts water and stir until dissolved.
- Pour the nectar carefully into the feeder, being sure not to overfill it or spill any of the liquid.
- Secure the lid or stopper back onto the feeder and hang it in a shaded location near flowers or other areas where hummingbirds are likely to gather.
By following these steps, you can enjoy the sight of beautiful hummingbirds feeding in your backyard. Remember to clean and refill the feeder regularly to keep the nectar fresh and prevent the growth of mold or bacteria.
What are the 5 easy steps to clean a hummingbird feeder?
Cleaning a hummingbird feeder is an important task that should be done on a regular basis to ensure the health and wellbeing of the birds.
Here are five easy steps to keep your hummingbird feeder clean:
- Disassemble the feeder completely.
- Soak all parts in a solution of one part white vinegar to four parts water for at least an hour.
- Use a small brush or cotton swab to clean any hard-to-reach areas or small openings.
- Rinse all parts thoroughly with clean water to remove any traces of vinegar.
- Dry all parts completely before reassembling the feeder.
By following these simple steps, you can ensure that your hummingbird feeder remains clean and sanitary, and is a safe place for these beautiful birds to come to.
How do you open a hummingbird feeder window?
To open a hummingbird feeder window, you will need to first take apart the feeder.
Here are some steps on how to do so:
- Turn the feeder upside down to see the base.
- Unscrew the base from the bottle by rotating it counterclockwise.
- Depending on the type of feeder you have, there may be additional pieces to unscrew or unclip from the base to fully take it apart.
- Once the parts of the feeder are separated, you should be able to access the hummingbird feeder window. You can then fill it with nectar and close it by reassembling the feeder in reverse order.
It’s important to clean the feeder regularly to ensure the safety and health of the hummingbirds. Always wash the feeder with hot water and soap, rinse thoroughly, and let it air dry before refilling it with nectar.
How do you open a bird feeder?
Opening a bird feeder can vary depending on the type of feeder but here are some general steps to follow:
- Understand the type of bird feeder you have. Some may have clips or latches, while others may simply lift off.
- Determine any locks or mechanisms that may secure the feeder and release them.
- Check for any screws or bolts and use the appropriate tool to remove them.
- If the feeder is filled with seeds, make sure to dump them out before trying to open it.
- Once opened, clean the feeder thoroughly before refilling it with seeds.
By following these steps, you can easily open your bird feeder and keep it clean for your feathered friends.
How do you clean a small hummingbird feeder opening?
To clean a small hummingbird feeder opening, you will first need to take apart the feeder. Refer to the previous heading, “How to take apart a hummingbird feeder,” for the steps on disassembling the feeder.
Once you have the components separated, focus on cleaning the small opening where the birds drink from.
Here are the steps to clean a small hummingbird feeder opening:
- Use a small brush or pipe cleaner to gently scrub the opening and remove any debris or buildup.
- Rinse the opening with warm water to remove any remaining dirt.
- Soak the opening in a mixture of one part white vinegar to four parts water for at least ten minutes to sanitize.
- Rinse with water again and allow to air dry completely before reassembling the feeder.
By thoroughly cleaning the small opening of the hummingbird feeder, you can ensure that the birds have clean and safe nectar to drink.

