How to Draw a Ruby Throated Hummingbird? 10 Steps!
To draw a ruby-throated hummingbird, follow these steps: sketch the basic shapes, add details, refine the drawing, and color it in.
Drawing a ruby-throated hummingbird involves breaking down the bird into simple shapes and then adding more intricate details, such as feathers and shading.
By following a step-by-step process, you can create an accurate representation of this beautiful bird.
Begin your drawing by sketching out the basic shapes that make up the hummingbird’s body, such as circles for the head and torso, and ovals for the wings and tail.
Next, draw the beak and eye details, keeping in mind that ruby-throated hummingbirds have long, thin beaks and large, expressive eyes.
As you progress, refine the drawing by adding more intricate lines and curves to represent the feathers, wings, and tail.
Finally, add shading and coloring techniques to give your hummingbird depth and realism, using bright greens and reds to mimic the bird’s vibrant plumage.
Step-by-Step Instruction to Draw a Ruby Throated Hummingbird
| Step | Description |
|---|---|
| 1 | Research ruby-throated hummingbirds. Familiarize yourself with their key features such as size, shape, and colors. |
| 2 | Gather drawing materials such as pencil, paper, eraser, and reference images of ruby-throated hummingbirds. |
| 3 | Sketch the basic shapes. Start with a small circle for the head, an oval for the body, and lines for the wings and tail. |
| 4 | Draw the beak. Add a long, thin and slightly curved line for the beak from the head circle. |
| 5 | Outline the wings. Draw the wings starting from the top of the body oval and extending outward with a rounded, elongated shape. |
| 6 | Sketch the tail feathers. Draw the tail feathers extending from the bottom of the body oval, with a slight downward curve. |
| 7 | Add details to the head. Draw the eye, a small circle, and the ruby-colored throat patch, typically an elongated oval shape. |
| 8 | Refine the body shape. Smooth out the body lines, and add markings and feather textures to the wings and tail. |
| 9 | Add color. Using colored pencils or markers, fill in the hummingbird’s colors, including the green back, ruby throat, and white underbelly. |
| 10 | Review and refine. Check your drawing for accuracy and make any adjustments as needed. Erase any stray lines and refine details. |
Key Takeaway
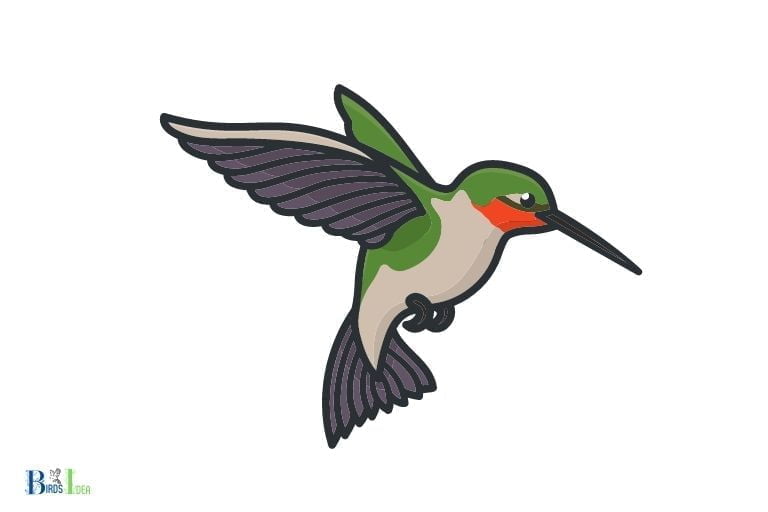
Five Facts About Ruby Throated Hummingbird
Materials And Preparation
Required Materials For Drawing A Ruby Throated Hummingbird
When it comes to creating an artistic masterpiece, it’s important to have the right materials available.
To draw a vibrant ruby throated hummingbird, you’ll need the following items:
- Pencil or pen
- Paper or sketchbook
- Eraser
- Colored pencils or watercolors
- Hummingbird reference image
Tips For Setting Up An Ideal Workspace
Creating a comfortable and functional workspace is essential to ensure you can concentrate without any distractions.
Here are some tips for setting up an ideal workspace:
- Choose a quiet and well-lit room
- Use an adjustable chair and table
- Set up the easel or computer at eye level so that you avoid bending over or straining your neck
- Ensure adequate desk space with room for drawing supplies, sketches, and water bottle within arm’s reach
Importance Of Proper Preparation
Proper preparation is essential to create a stunning ruby throated hummingbird drawing.
Here are some steps to follow before you start the drawing process:
- Find and collect all necessary materials
- Choose your reference imagery, paying attention to nuances and details of a hummingbird’s realistic portrayal
- Sketch out ideas and experiment with different angles and positions.
- Practice the hummer’s finer points like contour lines and shading to create a perfect piece of art.
Remember, with these basic steps in mind and correct use of materials your finished draw of a ruby throated hummingbird is sure to be a masterpiece.
Steps For Drawing A Ruby Throated Hummingbird
Have you ever wanted to draw a beautiful ruby throated hummingbird? These tiny creatures are fascinating and can make for a great subject for your next drawing project.
Here are the steps you can follow to draw a realistic and detailed hummingbird:
Step 1: Sketching The Outline
Before you start adding details to your drawing, you need to create a rough outline of the hummingbird.
Begin by sketching the general shape of the bird with a light hand. Once you have an outline, you can start adding more defined details.
Step 2: Adding Body Details
Now that you have the outline in place, you can start bringing your hummingbird to life by adding more body details.
Add the feathers by creating a series of overlapping ovals on the body. You can also add the feet and tail to complete the body.
Step 3: Drawing The Head And Beak
The head and beak of the ruby throated hummingbird are the most identifiable parts of this bird.
Sketch the head and add details such as the eyes, beak, and the feathers on the head. Make sure you pay attention to every detail of the head and beak to get the drawing just right.
Step 4: Creating Intricate Wing Details
The wings of the ruby throated hummingbird can be one of the most challenging parts to draw.
Start by sketching the basic wing structure and adding the details such as the feathers. Make sure you focus on the patterns and the texture of the feathers.
Step 5: Bringing Your Hummingbird To Life With Color
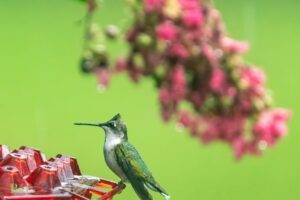
Now that your drawing is complete, it’s time to add color to your ruby throated hummingbird. These birds have a bright red throat, a green back, and white or gray belly.
Take your time with the coloring, making sure to stay true to the real-life colors of these tiny birds.
Drawing a ruby throated hummingbird requires patience, attention to detail, and practice. By following these steps and putting in the effort, you can create a beautiful and realistic drawing of this fascinating bird.
Pro Tips For Drawing Ruby Throated Hummingbird
How to draw a ruby throated hummingbird: pro tips for drawing ruby throated hummingbird
Have you ever seen those magnificent ruby-throated hummingbirds? Their tiny, yet vibrant wings fluttering leaves most onlookers mesmerized.
If you are an artist, you might have tried capturing the little bird’s beauty by drawing it. In this blog post, we are going to explore some pro tips for drawing ruby throated hummingbirds that will make your artwork stand out.
Understanding Light And Shadow
The first and foremost aspect of creating a realistic rendition of a ruby-throated hummingbird is to understand the importance of light and shadow.
Here are some points to consider:
- Use a reference image that clearly shows light and shadow on the hummingbird’s body
- Pay attention to the direction of light, which will help you create varying shades of color
- Highlight the shadows that will enhance the bird’s three-dimensional effect
Proper Blending Techniques
The blending technique is another vital aspect of drawing a ruby-throated hummingbird.
Here are some tips to help you master the art of blending:
- Use a light hand while coloring the bird’s feather
- Blend colors in a circular motion using a blending tool to create a smooth transition of colors
- Use multiple layers of color to get the perfect blend
Enhancing The Details Of The Drawing
The beauty of a ruby throated hummingbird lies in its intricate details.
Here are some tips to enhance the bird’s details:
- Pay attention to the bird’s beak, feet, and feathers’ details
- Use a smaller brush or pencil to capture the tiny feathers and the bird’s facial features.
- Opt for darker shades while capturing the bird’s eye color to make it pop.
Importance Of Practice And Persistence
Drawing a realistic ruby-throated hummingbird requires patience, practice, and persistence.
Here are some tips to help you with your practice routine:
- Start by drawing the bird’s basic shapes and work your way towards the detailed features
- Keep a reference image nearby to help you with the bird’s positioning and proportions
- Don’t hesitate to make mistakes, as they are a part of your learning curve.
These pro tips will help you draw an outstanding ruby-throated hummingbird. Remember, the key to success is in your dedication and willingness to practice more.
Keep honing your skills, and who knows, you might even surpass your own expectations!
FAQ On Drawing a Ruby Throated Hummingbird
What Is A Ruby Throated Hummingbird?
What Do I Need To Draw A Ruby Throated Hummingbird?
How Do I Draw A Ruby Throated Hummingbird?
What Are The Colors Of A Ruby Throated Hummingbird?
Where Can I Find Ruby Throated Hummingbirds?
Conclusion
Once you have followed the above-mentioned steps, you can finally draw yourself a beautiful ruby-throated hummingbird. With patience and practice, you will improve your drawing skills and create more realistic artwork. Make sure to always keep your lines light until you have the final shape of the bird.
Don’t forget to add the details such as the feathers, the eye, and the beak, as they add to the realism of the bird. With a little bit of creativity, you can even add other elements to your drawing such as flowers or a landscape.
Drawing a ruby-throated hummingbird is not only fun and fulfilling but also a great way to observe nature in detail. Let your creativity soar and create a beautiful piece of art.

