How to Paint a Hummingbird on a Rock: Few Steps!
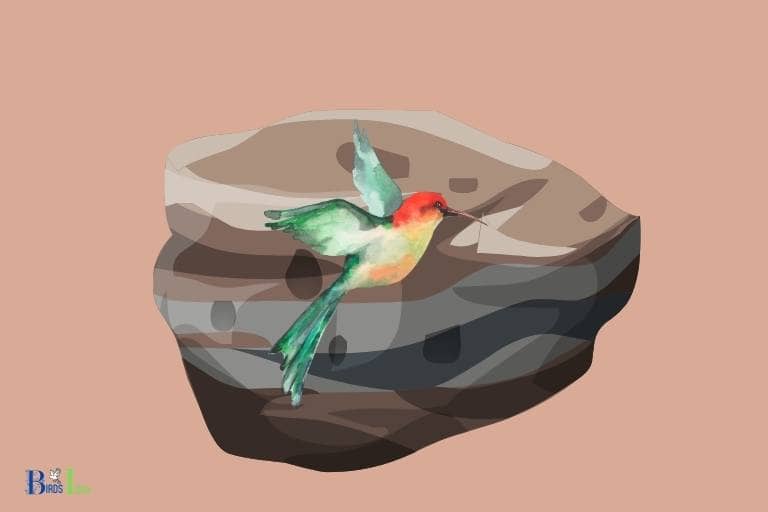
To paint a hummingbird on a rock, follow these steps: choose a suitable rock, clean & prepare the surface, sketch the hummingbird, apply a base coat, add details and colors, and finally, seal the artwork.
Painting a hummingbird on a rock is a fun and creative activity that involves selecting an appropriate rock as your canvas, preparing it for the artwork, sketching the bird, applying paint in layers, and eventually sealing it to protect your artwork from the elements.
Next, sketch the hummingbird outline on the rock with a pencil or chalk. Start with a base coat of paint using acrylics or outdoor paint, then add more layers and details to create depth and texture in your artwork.
Lastly, seal the rock painting with a clear, weather-resistant spray or varnish to preserve its beauty and protect it from the elements.
10 Step-by-step Guide to Painting a Hummingbird on a Rock
| Step | Materials Needed | Instructions |
| 1 | Rock, soap, water, towel | Find a smooth, flat rock that resembles the shape of a hummingbird. Clean the rock with soap and water, then dry it with a towel. |
| 2 | Pencil, reference image | Draw a light pencil outline of a hummingbird on the rock using a reference image for guidance. |
| 3 | Acrylic paints, palette, water | Prepare your acrylic paints by placing them on a palette. Add a few drops of water to thin them if necessary. |
| 4 | Brushes (small detail brushes) | Select the appropriate brushes for painting small details such as the feathers, beak, and eyes. |
| 5 | Base colors, brush | Apply the base colors for the hummingbird using a small brush. Use larger brushes for bigger areas and smaller brushes for smaller areas. |
| 6 | Secondary colors, brush | Add secondary colors and shading to the hummingbird, blending the colors together to create a smooth transition. |
| 7 | Highlights, brush | Add highlights to the hummingbird’s feathers, eye, and beak using a small brush and lighter paint colors. |
| 8 | Background, brush | Paint the background around the hummingbird using a larger brush and complementary colors. Consider adding flowers, leaves, or other elements to create a natural scene. |
| 9 | Fine details, brush | Use a small detail brush and thin paint to add fine details such as individual feathers, eye reflections, and texture. |
| 10 | Varnish (optional) | Once the paint is completely dry, apply a protective varnish to the rock to preserve the artwork and enhance the colors. Allow the varnish to dry following the manufacturer’s instructions. |
Key Takeaway
Five Facts About: Painting a Hummingbird on a Rock
Materials Needed
Before starting to paint a hummingbird on a rock, it’s essential to gather all the necessary materials. It’s best to have everything in one place for ease of access.
Here are the materials needed to paint a hummingbird on a rock:
- Acrylic paint: Acrylic paint is a popular choice for rock painting, as it’s quick-drying and water-resistant. You can choose from a wide range of colors to create a vibrant hummingbird.
- Paintbrushes: Paintbrushes come in different sizes and shapes. For painting a hummingbird on a rock, you’ll need small-sized brushes with thin bristles for fine details.
- Small rocks: You can choose any rock size to paint a hummingbird on it, but a smaller size is more manageable and easier to handle.
- Palette: A palette is a flat surface to hold and mix paint while painting. You can use any non-porous surface as a palette, but a plastic or ceramic palette works best.
- Water cup: A water cup is used to clean your brush between colors and paint layers. Use a small cup or a jar to hold water.
- Paper towels: Paper towels are handy for drying off your paintbrushes and wiping away unwanted paint.
Make sure to have a clean and well-ventilated workspace with good lighting when painting a hummingbird on a rock. Once you have all your materials, you’re ready to create a beautiful hummingbird on a rock.
Preparing The Surface
Painting a hummingbird on a rock can be a fun and engaging project for artists of all levels.
However, before diving into the painting process, it is important to properly prepare the surface of the rock to ensure that the paint adheres well and the final product turns out beautifully.
Here are some key steps to follow when preparing the surface:
Choosing The Right Rock For Painting
When selecting a rock for painting, it is important to choose a smooth and flat rock with minimal bumps and crevices. The rock’s surface should be able to hold the paint without causing it to smudge or smear.
Aim for a light-colored stone if you want your paint colors to appear bright and vivid.
Cleaning And Preparing The Rock Surface
Before starting to paint, it’s crucial to clean the rock surface thoroughly. Wash the rock with soap and water to remove any dirt, paint, or debris. Dry the rock thoroughly and lay it flat on a cloth or paper towel.
Sanding The Rock If Necessary
If the surface of the rock is rough or uneven, consider sanding it down to achieve a smoother surface.
Start with a fine-grit sandpaper and gradually move up to a higher grit until the surface feels smooth and even to the touch.
Be sure to clean the rock again after sanding to remove any dust or debris.
By following these basic steps, you’ll be able to create the perfect canvas for your hummingbird painting.
With a smooth rock surface, you’ll be able to paint with more precision and detail, allowing your artwork to truly shine.
Sketching The Hummingbird
Reference Images And Sources
Before you start sketching your hummingbird on a rock, gather some reference images of hummingbirds. You can find high-quality images online on various birdwatching websites or in bird identification books.
Having a reference image will help you visualize the position of the hummingbird and its physical features, providing you an idea of what you need to sketch on the rock.
Pencil Sketching Techniques
Sketching a hummingbird requires precision and skill.
Here are a few tips for penciling the perfect hummingbird on your rock:
- Use a range of pencils, including hard, medium, and soft, to achieve different shades of gray and produce texture.
- Start by sketching the basic shape of the hummingbird, focusing on the head, wings, and tail.
- Add the details, such as the feather patterns, stripes, and markings, by referencing your image source.
- Erase any undesired lines gently and work slowly to build up detail and depth until the final sketch emerges.
Outlining The Sketch With Paint
Once your hummingbird sketch is complete, it’s time to start outlining it with paint.
Below are the steps to achieve perfect outlines:
- Choose the paint color depending on the bird’s natural color, considering light or dark shades as well as saturation.
- Dip your small brush in the paint and remove the excess on the side of the container so as not to have too much on the brush.
- Make sure your hand is steady and paint around the edges of the hummingbird, outlining the key features like feathers or lines.
- Use a steady hand, keep the brush level with the rock, and work slowly to build up the shape and detail of the hummingbird.
By following these tips, you’ll have a stunning hummingbird painted on a rock to display and show off your artistic talents!
Painting The Hummingbird
Painting The Hummingbird:
When it comes to painting a hummingbird on a rock, the most important part is the painting process.
Before you start painting your hummingbird, gather all the required painting supplies such as paintbrushes, paint, rock, and above all, your creativity.
Once you have everything, follow these essential steps to paint a hummingbird on a rock.
Color Mixing Techniques:
Mixing colors is a fundamental aspect of painting a hummingbird on a rock. It would be best to mix the required colors to create the colors you need to paint your hummingbird.
Below are some useful tips on color mixing techniques:
- Use a color wheel to see which colors to mix to get your desired color.
- Mix darker shades of colors with lighter shades to get a more natural blend.
- Experiment with different amounts of paint to get the right color.
Layering And Blending Techniques:
Layering and blending techniques are crucial when painting a hummingbird on a rock.
Below are some useful tips on layering and blending techniques:
- Start with the lightest colors and then work your way up to the darkest colors.
- Blend colors to create new shades.
- Use different brush strokes to create different texture effects.
Use Of Different Brush Strokes And Sizes:
The use of different brush strokes and sizes is crucial in the painting process.
Below are some useful tips on brush strokes and sizes:
- Use a small brush for fine details.
- Use a thick brush for larger areas.
- Different brush strokes create different textures such as feather texture.
Adding Details Like Eyes, Beak, And Feathers:
Adding details like eyes, beak, and feathers, enhances the natural beauty of your hummingbird painting.
Below are some useful tips on adding details:
- Use a small brush to emphasize small details like the eye and beak.
- Use different brush strokes to create feather texture.
- Use black paint to create outlines around the details.
By following these fundamental steps and techniques, you can paint your own hummingbird on a rock. Remember to have fun and let your creativity flow!
Finishing Touches
Capture the stunning beauty of nature by painting a hummingbird on a rock! In the previous sections, we covered the basics of painting your rock and adding intricate details to create a realistic hummingbird.
Now let’s move on to adding a clear coat for protection and longevity, displaying your work, and tips for future projects.
Adding A Clear Coat For Protection And Longevity
Once your paint has dried completely, it’s time to protect your artwork.
Here are a few key points to keep in mind when applying a clear coat:
- Ensure that there is no dirt, dust, or debris on your rock before applying the clear coat. This will prevent small particles from becoming trapped under the coat.
- Use a paintbrush to apply the clear coat in even strokes across the entire surface of your rock. Be sure to coat all areas, including the intricate details and hummingbird itself.
- Let the clear coat dry completely before touching, moving, or displaying your rock.
Displaying Your Painted Rock
Now that your rock is complete and protected, it’s time to display it and appreciate your artwork.
Here are a few ideas for displaying your painted hummingbird rock:
- Place it on a shelf or coffee table for decoration
- Gift it to a friend or loved one who appreciates hummingbirds or art
- Use it as a paperweight on your desk
- Add it to your rock painting collection
- Display it outside in a garden or patio area
Tips For Future Projects
If you plan on painting more rocks in the future, here are a few tips to keep in mind:
- Experiment with new designs and styles to keep your projects fresh and fun.
- Use a variety of rock sizes, shapes, and colors for a diverse collection.
- Collect inspiration from nature, art, or even your favorite colors to create unique designs.
- Try different painting techniques, such as adding texture or using a splatter effect.
Adding a clear coat, displaying your rock, and tips for future projects are all important parts of the rock painting process. By following these tips, you can create beautiful, one-of-a-kind artwork that will last for years to come.
Happy painting!
FAQ For How To Paint A Hummingbird On A Rock
How Do I Choose The Right Rock For Painting A Hummingbird?
What Type Of Paint Is Best For Painting On Rocks?
How Do I Draw A Hummingbird On A Rock?
How Do I Add Details To My Painted Hummingbird?
How Do I Seal My Finished Hummingbird Rock Painting?
Conclusion
After learning all the steps, materials, and techniques involved, you can now paint your very own hummingbird on a rock! This diy project is not only fun and fulfilling, but also a great way to express your artistic side.
With practice and patience, you can hone your skills and even create your own unique designs.
Remember to take your time and pay attention to the small details, as they can make a big difference in the final result. Also, don’t be afraid to experiment with different colors and styles to make your painting truly your own.
Share your masterpiece with family and friends and inspire them to try it too. Happy painting!

