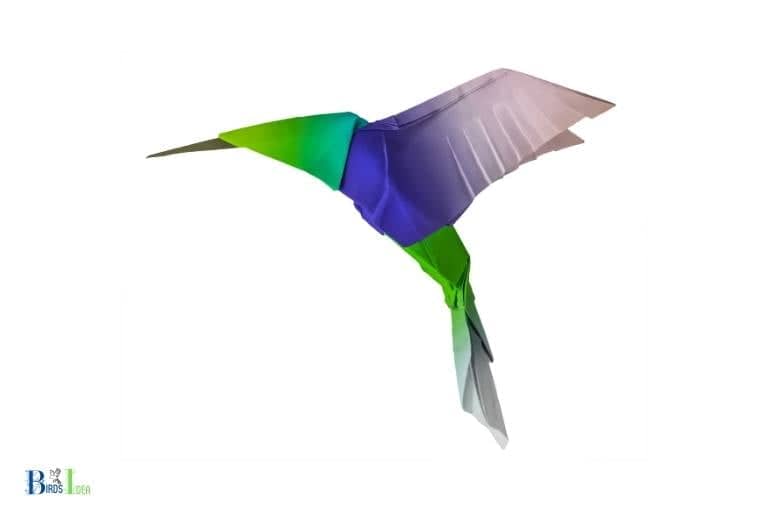
How to Make an Origami Hummingbird: A Guide!
To make an origami hummingbird, you will need a square piece of paper, patience, and the ability to follow a series of intricate folding steps.
Origami is the traditional Japanese art of paper folding with the goal of transforming a flat square sheet of paper into a finished sculpture through various folding techniques.
Quick Overview
To begin creating your origami hummingbird, start with a square piece of paper and follow a step-by-step tutorial that explains the folding process.
Initially, you will make basic folds like the valley fold, mountain fold, and reverse fold, which will help create the hummingbird’s shape. As you progress, the steps will become more intricate, requiring patience and practice.

Materials Needed to Make an Origami Hummingbird
Types Of Paper Suitable For Origami:
When it comes to origami, the choice of paper is critical. The right kind of paper will help create a beautiful and impressive-looking origami hummingbird.
Here are some types of paper that are suitable for origami:
- Kami paper: This is thin and lightweight, making it easier to fold and maneuver. It comes in many colors and patterns, making it ideal for origami hummingbirds.
- Tant paper: This is a bit thicker than kami paper, with a slightly textured surface. It holds creases well, allowing you to create intricate designs.
- Washi paper: This is a type of japanese paper that is made from plant fibers. It is thin, lightweight, and has a beautiful texture that adds depth and complexity to origami creations.
How To Choose The Perfect Paper For Your Project?
Choosing the right paper for your origami hummingbird project can make all the difference.
Here are some factors to consider when selecting paper:
- Color: The color of the paper should complement the design of the hummingbird. Bright, vibrant colors can add energy, while muted colors can create a more subdued effect.
- Thickness: The thickness of the paper will affect how easy or difficult it is to fold and shape the hummingbird. Consider the intricacy of the design and choose a paper that can hold up to fine folds and creases.
- Texture: The texture of the paper can add depth and complexity to the final product. Smooth papers will produce a more polished finish, while textured papers can add interest and dimension.
Other Materials Needed For The Hummingbird Design:
Here are some other materials you will need:
- Scissors: You will need a good pair of scissors to cut the paper to the right size.
- Glue: Some origami designs require glue to hold certain parts together.
- Ruler: A ruler can be helpful when measuring and cutting paper.
- Folding tool: This can be any pointed object, such as a toothpick or a bone folder, which will help create sharp creases and folds in the paper.
Remember that practice makes perfect when it comes to origami, so don’t be discouraged if your first origami hummingbird doesn’t come out exactly as you hoped. Keep practicing, and you’ll be creating beautiful origami hummingbirds in no time!
Here the Steps How To Making An Origami Hummingbird
Preliminary Steps Before Folding
Before jumping into the main steps, there are a few things that need to be taken care of:
- Choose origami paper of standard size (15 cm x 15 cm) to create a perfect hummingbird.
- Ensure that the folding surface is smooth and clean; this prevents tearing of the paper. A hard surface, such as a sturdy table, is more appropriate than a soft one.
- Keep the focus and concentration level high, this helps to avoid any mistakes.
Basic Folds Needed For The Hummingbird Design
The origami hummingbird design requires six basic folds.
These include:
- Mountain fold
- Valley fold
- Petal fold
- Rabbit ear fold
- Squash fold
- Reverse fold
Having familiarity with these basic folds makes the folding process simpler and easier.
Detailed Step-By-Step Guide For Each Fold
Step 1: Mountain Fold
- Take the origami paper, and fold it diagonally to make a triangle. Make sure that the corners are aligned precisely.
- Rub the crease with your finger to make it sharp.
- Unfold the paper, and fold the other diagonal side.
- Again, rub the crease to sharpen it.
Step 2: Valley Fold
- Take the top corner of the triangle and fold it downwards.
- Align the edges to make a valley fold. Crease the paper.
- Unfold the paper to see the valley fold.
Step 3: Petal Fold
- Take one corner of the paper, fold it to meet the topmost point of the triangle.
- Repeat this with the other side.
- Turn the paper over and repeat the same folds.
Step 4: Rabbit Ear Fold
- Take a corner of the paper, and bring it towards the center, creating a crease.
- Do the same on the other side.
- Open the paper and fold the corners to make the rabbit ear shape.
Step 5: Squash Fold
- Take the top layer of the paper from both sides, and fold it towards the center of the paper.
- Press the folds to create a squash fold.
Step 6: Reverse Fold
- Take the top of the paper, and fold it towards the bottom.
- The paper will create a reverse fold, shape the tail of the hummingbird.
Repeat these steps with the other side to finish the origami hummingbird.
Common Mistakes To Avoid While Folding
- Starting with the wrong size paper can make the folding process difficult.
- Folding the paper too hard can cause it to tear.
- Not creasing the paper properly can cause the model to be misshapen.
Keeping these common mistakes in mind helps to make the origami hummingbird more precise and realistic.
Tips And Tricks To Enhance Your Origami Skills
Origami is an ancient art form that has gained popularity around the world. Making an origami hummingbird is a fun and rewarding experience, but mastering the craft can be challenging.
Here are some tips and tricks for beginners and advanced origami enthusiasts to enhance their origami skills and create their own designs.
Practice Tips For Beginners
If you’re new to origami, these tips will help you master the basics and build your confidence:
- Start with simpler designs and work your way up to more advanced ones.
- Choose thin paper that folds easily and holds its shape.
- Follow the instructions carefully and be patient when folding.
Advanced Techniques For More Experienced Origami Enthusiasts
For those who have more experience with origami, here are some advanced techniques to take your skills to the next level.
- Experiment with different types and textures of paper, such as metallic or patterned paper.
- Try wet-folding, a technique that moistens the paper to create more flexible and detailed shapes.
- Learn how to make complex folds, such as the squash fold or the reverse fold.
- Master the art of shaping, which involves manipulating the paper to create curves and angles.
- Practice modular origami, which involves creating multiple pieces and assembling them into a larger design.
Tips To Create Your Own Designs And Personal Style
Once you have mastered the basics and advanced techniques, you can start creating your own designs and developing your unique style:
- Draw inspiration from nature, geometric shapes, or everyday objects.
- Start with a simple base model and add your own embellishments and details.
By following these tips and tricks, you’ll be on your way to becoming an origami master in no time.
Conclusion
The art of origami can be a relaxing and rewarding way to pass the time, and making an origami hummingbird is an excellent beginner’s project. With just a few simple folds, you can create a beautiful paper bird that can be enjoyed by all ages.
By using the step-by-step instructions provided in this guide, you have learned how to create a delicate and detailed hummingbird, and you can now experiment with different paper types and colors to customize your creation.
With practice, you can continue to improve your origami skills and create even more intricate and impressive designs.


