How to Paint Hummingbird Wings: Simple Steps!
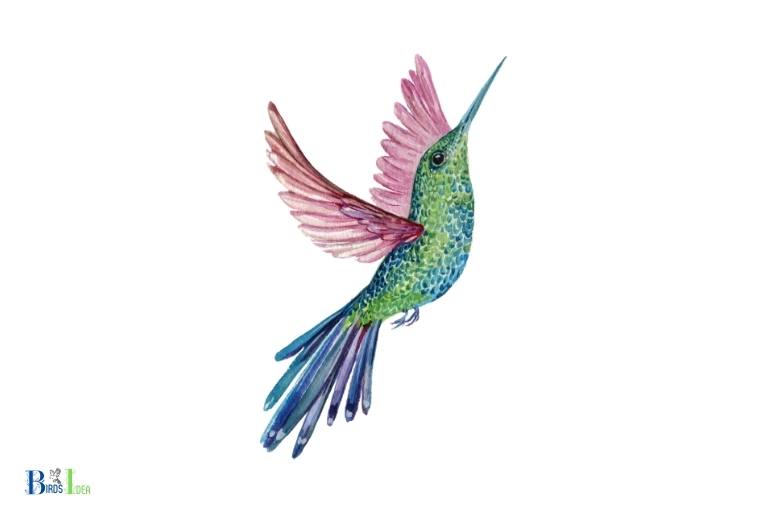
To paint hummingbird wings, follow these steps: sketch the outline, choose appropriate colors, create a layer of base color, add details with thin brush strokes, and apply highlights and shadows.
Painting hummingbird wings requires attention to detail, as their wings are delicate and consist of complex patterns.
To create a realistic and visually pleasing painting, it’s crucial to carefully observe the wing structure, color, and iridescence that hummingbirds are known for.
There are a few essential steps to follow when painting hummingbird wings.
Choose a limited color palette for consistency throughout the painting, and use transparent or semi-transparent paints (such as watercolors or acrylics) to replicate the iridescence of the wings.
Begin by applying a layer of base color to the entire wing, then gradually build up details using thin brush strokes for the feathers.
Lastly, add highlights and shadows to create depth and a sense of movement in the wings.
10 Steps To Painting Hummingbird Wings
| Step | Description | Materials Needed |
| 1 | Sketch the shape of the hummingbird wings | Pencil, paper/reference photo |
| 2 | Transfer the sketch onto the painting surface | Tracing paper, graphite paper, or a lightbox |
| 3 | Choose the colors for the wings | Acrylic or watercolor paints, color palette, reference photo |
| 4 | Paint a light base coat on the wings | Light color paint, paintbrush, water |
| 5 | Add the first layer of feather details | Smaller paintbrush, various shades of paint |
| 6 | Paint additional layers to build depth and dimension | Fine-tipped paintbrush, various shades of paint |
| 7 | Apply highlights and shadows to the wings | Fine-tipped paintbrush, lighter and darker shades of paint |
| 8 | Paint any additional details, such as iridescence or texture | Fine-tipped paintbrush, iridescent paint or glaze |
| 9 | Allow the paint to dry thoroughly | None |
| 10 | Seal and protect the painted wings (optional) | Varnish or protective spray, paintbrush or cloth |
Key Takeaway
Five Facts About: Painting Hummingbird Wings
Understanding The Anatomy And Colors Of Hummingbird Wings
Painting hummingbird wings can be challenging but also rewarding when done correctly. Understanding the anatomy and colors of hummingbird wings is crucial to creating a lifelike painting.
In this section, we will explore the different types of hummingbird wings, the importance of studying the anatomy of hummingbird wings, understanding their colors and patterns, and compare them to other bird species.
The Importance Of Studying The Anatomy Of Hummingbird Wings
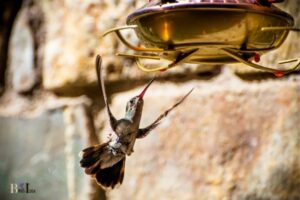
Hummingbirds are known for their spectacular hovering ability, which is made possible by their unique wing anatomy.
Studying the anatomy of hummingbird wings will help you understand how they move, which is essential for creating a realistic painting.
- The four primary feathers on each wing of the hummingbird control the upstroke and downstroke of the wing.
- The wrist joint is the only movable joint in the hummingbird’s wing, enabling the wings to rotate and move in a figure-eight pattern.
- The hummingbird’s wings are relatively short and broad compared to other bird species, allowing them to flap their wings much faster, which is an essential characteristic for hovering and feeding.
The Different Types Of Hummingbird Wings
Hummingbirds have three main types of wing shapes:
- High aspect ratio wings are narrow and long with a high aspect ratio, allowing hummingbirds to fly long distances without flapping their wings continuously.
- Elliptical wings are short and broad, providing hummingbirds with excellent maneuverability.
- Low aspect ratio wings are similar to elliptical wings, but they have a lower aspect ratio, allowing hummingbirds to fly faster in a straight line.
Understanding The Colors And Patterns Found In Hummingbird Wings
Hummingbirds have an exceptional range of colors and patterns, making them a popular subject for artists.
Understanding the colors and patterns found in hummingbird wings will help you create a realistic painting.
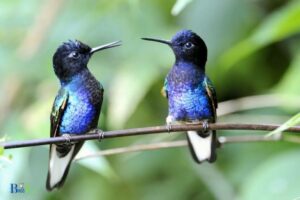
- The iridescent hummingbird feathers are created by layers of tiny platelets stacked on top of each other, reflecting different wavelengths of light at different angles to produce different colors.
- The patterns on hummingbird wings help them camouflage and protect themselves from predators and attract mates.
- Hummingbird feathers can change color depending on the angle of the light, which is essential to creating a realistic painting.
Comparing Hummingbird Wings To Other Bird Species
Hummingbird wings are unique and have several differences compared to other bird species.
- Unlike most birds, hummingbirds can rotate their wings in a figure-eight pattern, enabling them to hover and fly backward.
- Compared to other birds, hummingbirds have a higher wingbeat frequency, enabling them to fly longer distances without flapping their wings continuously.
- The size and shape of hummingbird wings are finely tuned to their environment and allow them to maneuver quickly, making it challenging for predators to catch them.
Remember, understanding the anatomy, colors, and patterns found in hummingbird wings is crucial to creating a lifelike painting.
Using this knowledge, you can create a masterpiece that captures the beauty and uniqueness of these incredible birds!
Painting Techniques For Creating Realistic Hummingbird Wings
Hummingbirds are fascinating creatures, and painting their wings requires some skill and patience. In this blog post, we will guide you through the process of painting hummingbird wings step by step.
We will cover the essential painting techniques for creating realistic hummingbird wings, including the choice of paints and paintbrushes, preparing the workspace, tips for creating realistic feather textures, and shading and blending techniques.
Choosing The Right Paint And Paintbrushes For The Job
Choosing the right paint and paintbrushes is crucial to achieve a realistic representation of hummingbird wings.
Here are some essential points to consider:
- Choose high-quality, artist-grade watercolor paints for the best results.
- Use a pointed, detailed brush with a fine point for intricate work.
- A flat brush can be useful for creating larger areas of color and backgrounds.
Preparing The Canvas And Workspace
Before you start painting, prepare your workspace and canvas for the best results:
- Use a high-quality watercolor paper with a smooth surface.
- Use a waterproof pencil to draw an outline of the hummingbird’s wings on the paper.
- Set up your workspace in a well-lit area without direct sunlight or harsh lighting.
Tips For Creating Realistic Feather Textures
To create realistic feather textures, follow these tips:
- Make sure your brush is loaded with the right amount of paint, so the strokes are not too thick or too thin.
- Add small touches of paint for the individual feathers’ details.
- Use a dry brush technique to create a wispy effect for the wingtip feathers.
Step-By-Step Guide For Painting Hummingbird Wings
Here are the steps to follow when painting hummingbird wings:
- Paint the base color start by painting the whole wing with a base color, usually a bright, vibrant color.
- Add the details using a fine brush, add individual feather details to the wing using a lighter or darker shade of the base color.
- Shade and blend use different shades of the base color to create shadows or highlights on the wing and blend the colors to create a seamless transition.
- Paint the veins using a fine brush, paint the veins that run through the wing. This will add depth and structure to the wing.
- Add the final touches add the tiny details, such as the glittering effect or the iridescence of the feathers, using a dry brush technique or a clear, metallic watercolor.
Painting hummingbird wings requires patience, attention to detail, and practice. However, with the right painting techniques and tools, you can create a beautiful and realistic representation of these fascinating creatures.
Adding The Finishing Touches: Beaks, Eyes, And Details
The Importance Of Adding Details To Complete The Painting
Hummingbirds are fascinating creatures, and to create a realistic painting, it’s crucial to add details to the beaks, eyes, and other features. Adding details not only makes the painting look amazing but also makes it easy to identify different species of hummingbirds.
Some of the benefits include:
- Adding interest and vibrancy to the painting
- Enhancing realism and authenticity
- Making the painting look complete and finished
Techniques For Painting Hummingbird Beaks And Eyes
When it comes to painting hummingbird beaks and eyes, every detail counts.
Here are some techniques you can use to create realistic beaks and eyes:
- Use the correct colour for beaks and eyes. This involves studying the different colours that hummingbirds have and using the right combinations
- Pay attention to the shape and size of the beak and eyes
- Use a small brush and steady hand to create detailed lines and shapes
- Add shadows and highlights to create a 3d effect for the beak and eyes
- Use the right brush strokes to create a texture that mimics the hummingbird’s feathers
Adding Finishing Touches Such As Shadows, Highlights, And Background Elements
Adding finishing touches such as shadows, highlights, and background elements can take your hummingbird painting to the next level.
Here are some tips for adding these finishing touches effectively:
- Use light and dark tones to create shadows and highlights that give the hummingbird depth and vibrancy
- Don’t be afraid to experiment with colours that show up in the bird’s natural surroundings to create a background that complements the painting
- Use a steady hand to capture fine details such as the texture of the feathers
- Be creative with your background, using bushes, flowers, and other natural elements to show off the hummingbird’s beauty without overpowering it
How To Avoid Overdoing It And Keeping The Painting Balanced
Overdoing things can ruin the delicate balance of the hummingbird painting, so it’s crucial to keep things balanced to create an effective painting.
Here are some tips to achieve this balance:
- Avoid overloading the painting with unnecessary details that draw away attention from the hummingbird
- Use colours sparingly and with purpose, and ensure you choose complementary hues
- Study the composition of the painting to ensure that different elements are distributed evenly
- Don’t be afraid to keep the painting simple and elegant
To sum up, painting hummingbird wings requires attention to detail, creativity and patience. By following these tips, you will be able to produce a breathtaking hummingbird painting that will be the envy of everyone who sees it.
Tips For Improving Your Hummingbird Wing Painting Skills
Painting hummingbird wings can be challenging due to their delicate and intricate nature. In this section, we’ll discuss some tips that can help you improve your painting skills.
Practicing Basic Techniques To Improve Your Skills
To become proficient at painting hummingbird wings, it is crucial to master some basic techniques.
Here are some tips to follow:
- Begin by practicing brush control, learning how to create fine lines and shapes with your brush.
- Experiment with blending colors to create depth and texture in your paintings.
- Practice creating a gradient effect, which involves gradually blending one color into another.
- Use cross-hatching techniques to create multiple layers of colors.
How To Analyze And Learn From Your Mistakes
Improving your painting skills isn’t just about mastering techniques; it’s also about being able to analyze and learn from your mistakes.
Here’s how:
- Take photos of your work and analyze them later. This will help you see what you did well and what you can improve.
- Note down what went wrong, and try to figure out why it went wrong. This will help you avoid making those mistakes again in the future.
- Get feedback from other artists or join a community where you can get critique and learn from other artists’ work.
Developing Your Own Unique Style
Developing your own unique style is crucial to becoming a successful painter.
Here are some tips to help you develop your style:
- Experiment with different mediums like watercolor, gouache, or acrylic, and find the medium that suits your painting style best.
- Use different color palettes and explore the color combinations that work best for your style.
- Be open to inspiration from different sources like nature, other artists, or even your dreams. This will help you create a unique style that stands out.
Resources And References For Learning More About Painting Hummingbirds
There are many resources available to help you improve your hummingbird wing painting skills.
Here are some references:
- Books like the complete watercolorist’s essential notebook: A treasury of watercolor secrets discovered through decades of painting and experimentation by gordon mackenzie.
- Online tutorials like the virtual instructor and skillshare offer lessons on painting hummingbirds.
- Join online communities like artistsnetwork and wetcanvas to get feedback and learn from other artists.
By following these basic techniques and tips, you can improve your hummingbird painting skills and develop your own unique style. Happy painting!
FAQ For How To Paint Hummingbird Wings
How Do I Paint Hummingbird Wings With Acrylics?
What Materials Do I Need To Paint Hummingbird Wings?
Can I Use Oil Paint To Paint Hummingbird Wings?
How Do I Paint The Iridescence Of Hummingbird Wings?
What Are Some Tips For Painting Realistic Hummingbird Wings?
Conclusion
Hummingbirds are some of the most fascinating birds out there, and their wings are equally impressive. By following the tips we’ve discussed in this article, you can paint hummingbird wings that are both beautiful and true to life.
Remember to start with a sketch, use thin layers of paint, and add details with a fine brush.
Don’t be afraid to experiment with colors, but do your research first to ensure accuracy. With a little practice and patience, you can create stunning paintings of these enchanting creatures.
We hope this tutorial has been useful, and we’d love to see your creations.
Keep honing your skills and exploring the world of hummingbirds, and you’re sure to come away with even more inspiration for your art.

